Sherman, set the WAYBAC machine to 1985…
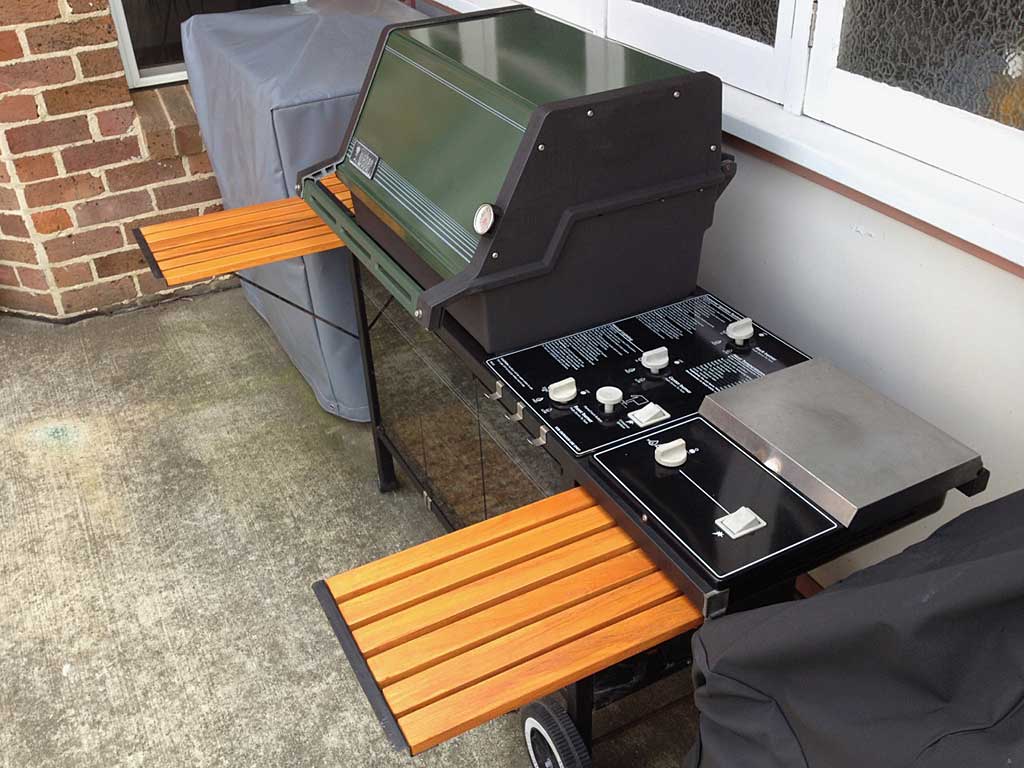
In that year, Weber introduced their first rectangular-shaped, stand up gas grills: The Genesis 1, 2, and 3. A few years later, Weber introduced two high-end versions of these grills: The Genesis 4 and 5. These two grills featured upgrades like stainless steel Flavorizer bars, pin-striped paint on custom gray- and mauve-colored lids, a matching porcelain enameled serving tray, the Steam-N-Chips smoker box accessory, and on the Genesis 5 an enclosed storage area with glass doors.
Another feature that both Genesis 4 and 5 grills shared was the FlameCheck Safety System. FlameCheck was carried over to the second-generation Genesis 4000 and 5000 grills introduced in the early 1990’s.

FlameCheck was a unique safety system that monitored the flame on the #1 front burner and cut-off the gas supply to the grill if the #1 burner went out. (Remember, these grills had three burners running left to right across the grill, with the control panel on the right side, and the #1 burner being the front, primary burner that was always lit first.)
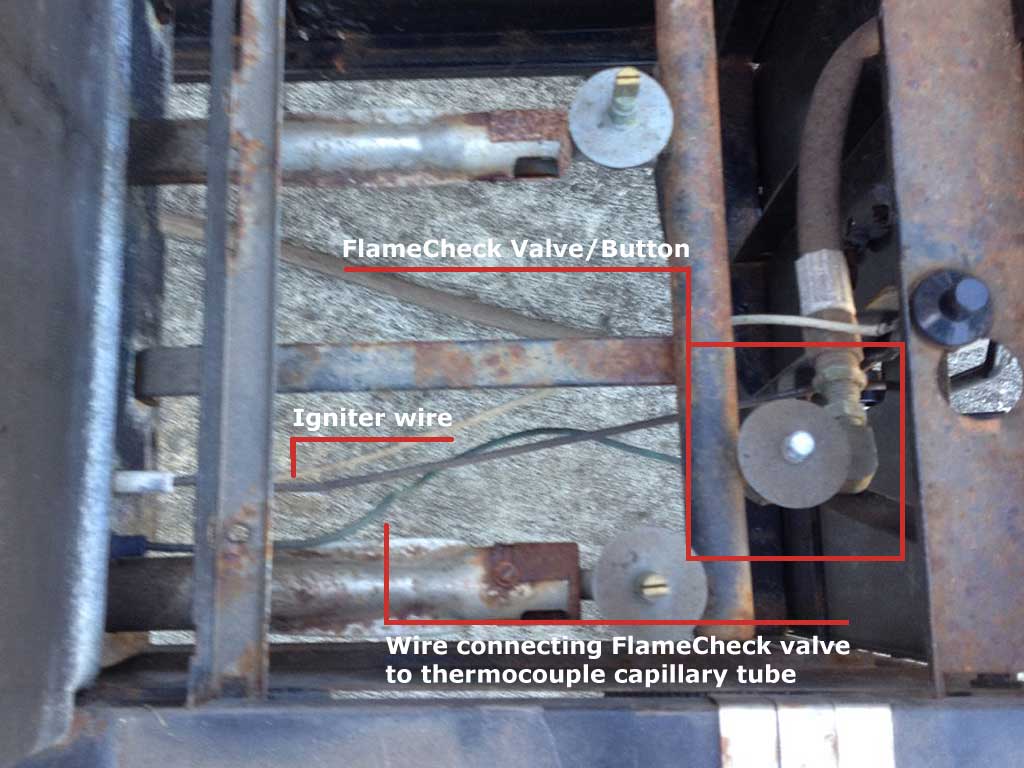
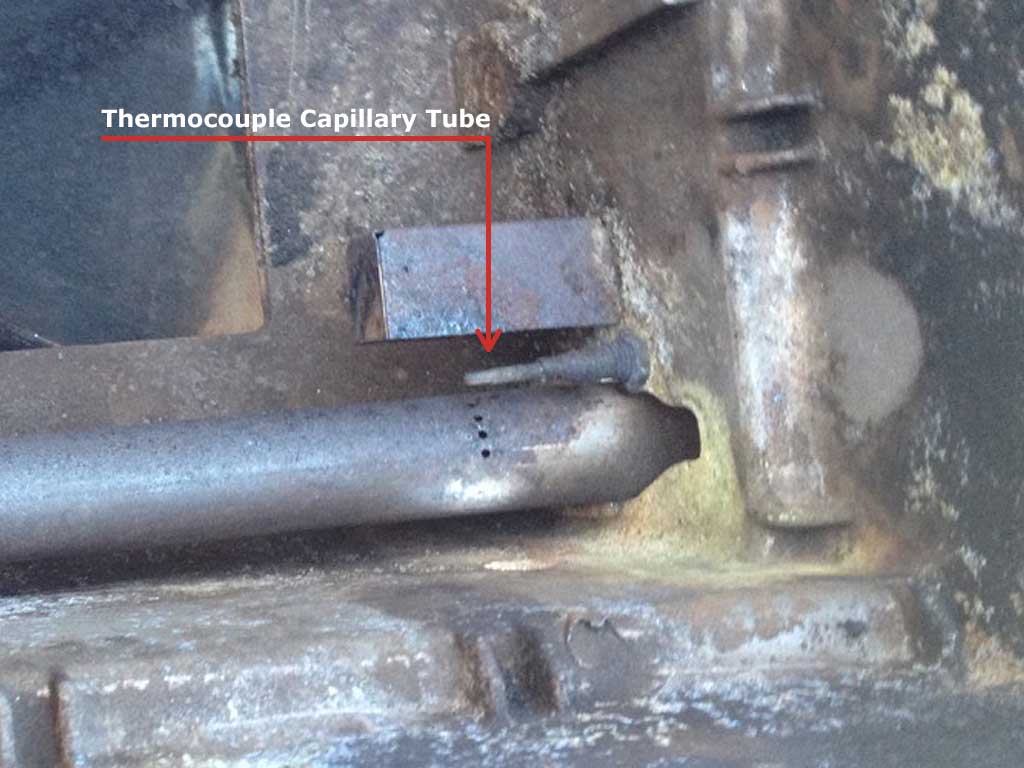
FlameCheck consisted of a gas valve positioned between the incoming gas supply hose and the gas manifold. Connected to this valve was a thermocouple capillary tube that aligned with the first two burner holes on the #1 front burner tube.
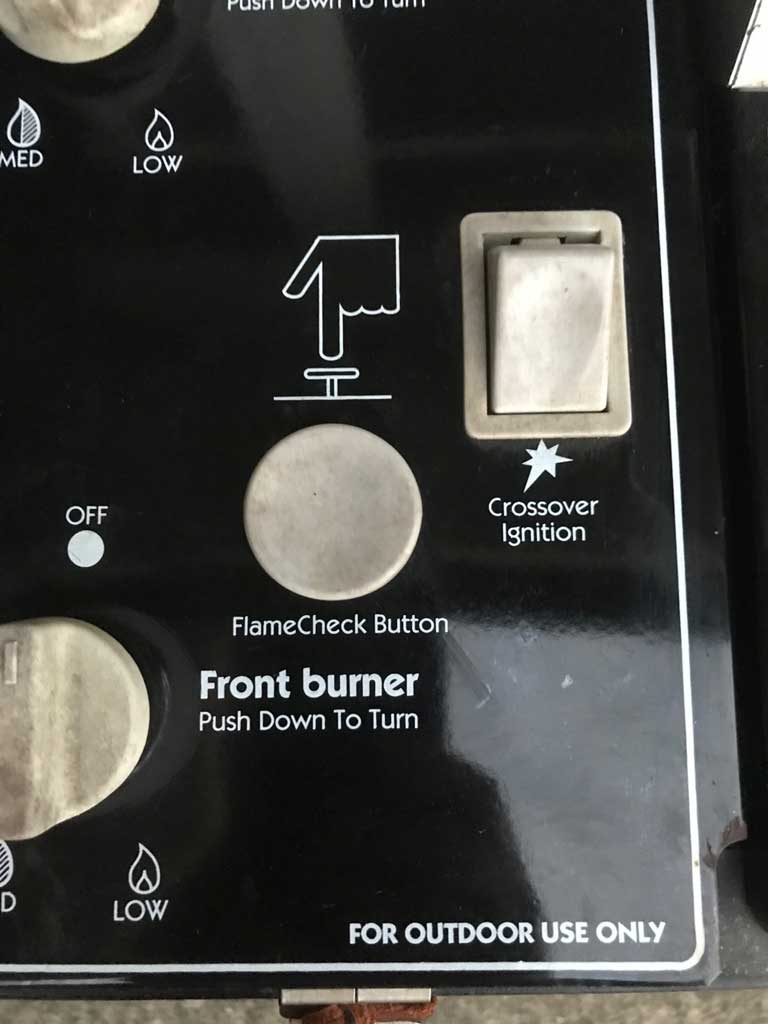
The FlameCheck valve had a spring-loaded button on top that had to be held down while the #1 front burner was being lit.
The instructions in the Owner’s Manual for lighting were as follows (emphasis is as shown in the manual):
- Turn the tank on by turning the tank valve counterclockwise.
- Push the front burner control knob down and turn to START/HI.
- Push down the FlameCheck button and hold down. Gas is supplied to the burner only when the FlameCheck button is depressed.
- Push the Crossover Ignition button several times, so that it clicks each time.
- Check that the burner is lit by looking through the matchlight hole on the front of the cooking box. If the burner is lit, continue to hold the FlameCheck button down for about 8 seconds. When the button is released the burner will stay light.
- After the FRONT burner is lit you can turn on the other burners. The FRONT burner must be on at all times when operating the other burners. The FlameCheck Safety System monitors the Front burner. For your safety, the FlameCheck valve will shut off the gas to the burners if the front burner should inadvertently go out during cooking.
So essentially, you held down the FlameCheck button for up to 8 seconds while the #1 front burner got the thermocouple capillary tube nice and hot, causing the liquid inside the tube to expand. When it got hot enough, the expanded liquid pushed against a diaphragm or similar mechanism that caused the FlameCheck valve to stay in the OPEN position when you released the button.
In retrospect, FlameCheck seems like a safety solution in search of a problem. I’ve never heard that burners going out was ever a big problem with Genesis gas grills. But let’s give the engineers at Weber the benefit of the doubt and assume for a moment that FlameCheck was a useful safety feature on these high-end Genesis grills.
The problems with FlameCheck were two-fold. One operational annoyance was that you always had to have the #1 front burner on while grilling. This was not a problem if you were grilling with burners 1/2/3 or 1/2 or 1/3. But for really low temperature grilling, you might want to use a single burner, and because of FlameCheck it had to be the #1 front burner—it couldn’t be the #2 or #3 burner by itself. Perhaps a small inconvenience for FlameCheck owners, but nevertheless a restriction that did not exist for owners of lower-level Genesis grills.
The bigger problem with FlameCheck came when the thermocouple capillary tube failed—and eventually it always failed. When this happened, the FlameCheck valve would not stay in the open position when the thermocouple capillary tube was heated, shutting off gas to the grill.
To add insult to injury, Weber stopped offering replacement parts for FlameCheck because so few of these high-end grills were sold over the years. Owners resorted to placing a brick over the FlameCheck button to hold it down to keep gas flowing to the burners. So much for the safety feature!
In 2000, Weber updated the Genesis line with new Silver, Gold, and Platinum models, and the FlameCheck Safety System disappeared as a feature on these grills.
If you’re into restoring old Weber Genesis gas grills, you may come across first- and second-generation models with an inoperative FlameCheck button. Simply disconnect the FlameCheck valve from the manifold and fasten the gas supply hose directly to the manifold, then remove the thermocouple capillary tube from the firebox. Otherwise, you’ll need to lay a brick or a paver over the FlameCheck button to keep the grill burning!
Thanks to The Virtual Weber Bulletin Board member Stephen R for providing the FlameCheck photos.
Follow-Up #1
No sooner do I mention this post on Facebook does someone named Chris Lewis post this reply:
“A button which functions the exact same way can still be found today on all marine (boat) gas stoves. In fact in the US it’s a requirement by law. Just a little fyi.”
This makes me wonder…did George Stephen or someone on the Weber engineering team own a boat with a marine stove that served as inspiration for adding this safety feature to high-end Genesis grills?
On another note, it should be mentioned that Weber built some lower-level Genesis grills with the FlameCheck Safety System for distribution outside of the United States. I’ve seen photos of a Genesis 2000 grill with FlameCheck that was sold in Norway in the 1990s.
Follow-Up #2
I recently came across this troubleshooting document for Weber Flamecheck. I’ve uploaded it to The Virtual Weber Bulletin Board mainly for historical interest…you may find it interesting, too.


