Category Archives: Tips & Techniques

Dating Herbs, Spices, Rubs & Pantry Ingredients For Freshness

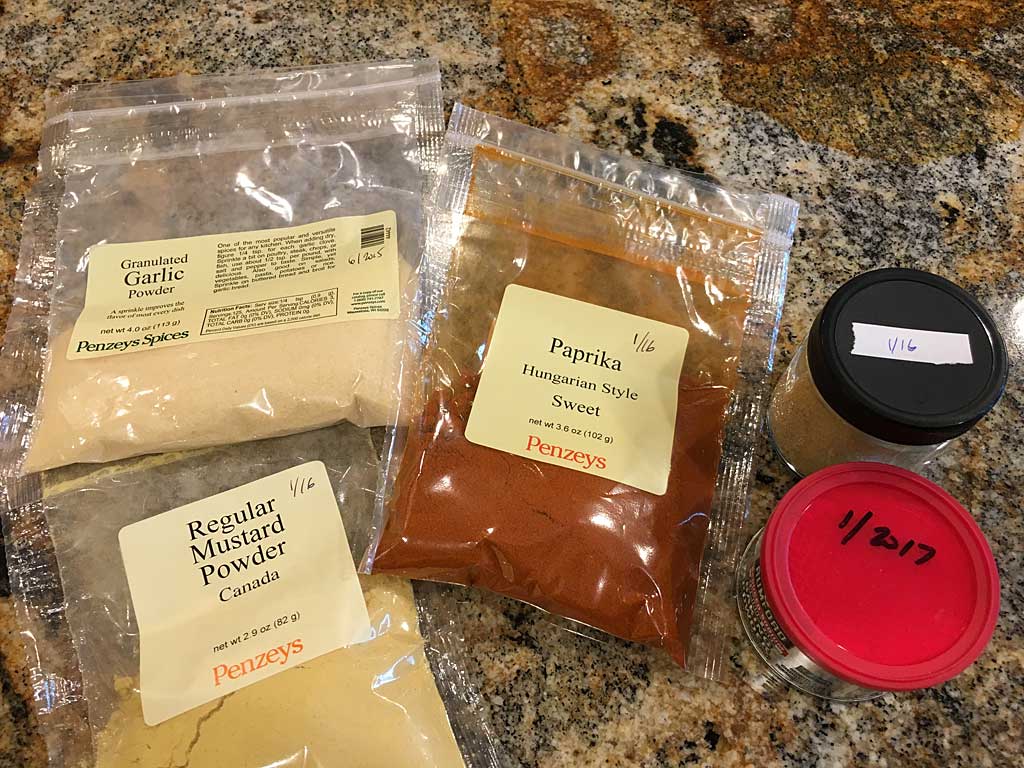
Here’s a quick tip: When you purchase any herb, spice, rub or pantry ingredient and you care about the freshness of that ingredient, simply write the month/year somewhere on the bottle or package as a reminder of when you purchased it.

Collection of spices and pantry ingredients

Now you can easily check any ingredient to see how old it is. I replace all my ground spices every two years; whole spices like peppercorns and nutmeg every four years. Baking ingredients like baking soda and baking powder I replace annually. Salt is the exception—it never goes bad and doesn’t need to be replaced.

Close-up of labeled spices and pantry ingredients

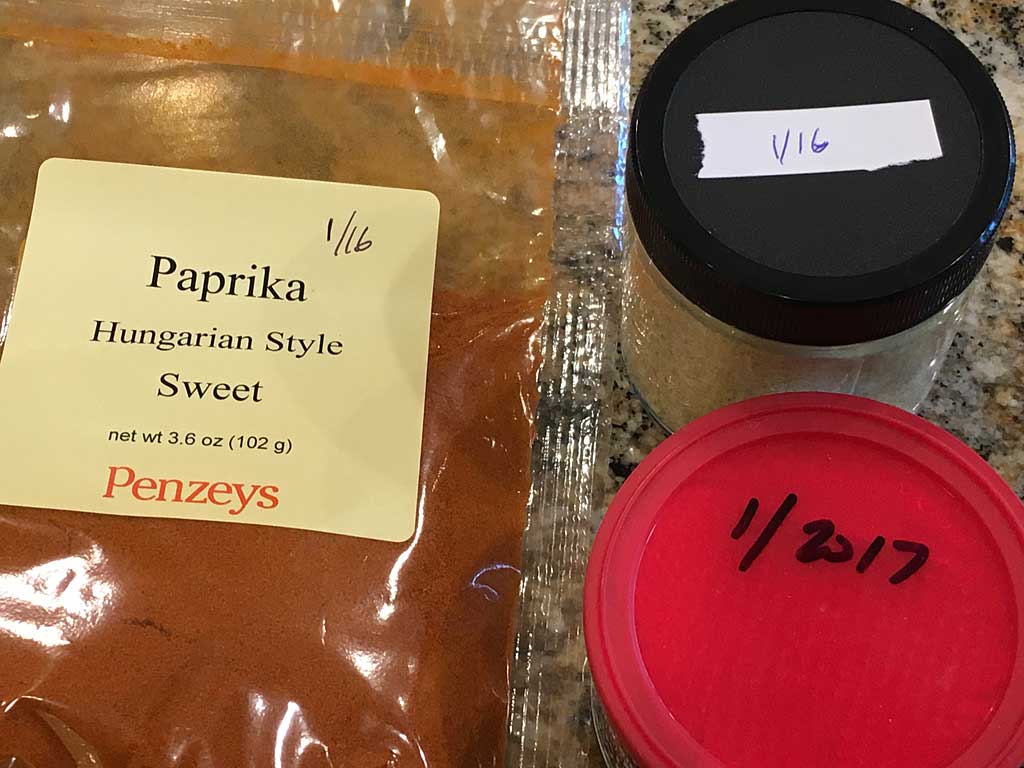
If you can’t write directly on the side or lid of a container, apply a sticker to the container and write the date on the sticker.

Cast Iron Cooking Grates: Which Side Is Up?

I spend a fair amount of time walking around hardware stores and home centers looking at Weber grills. When I open the lid of many display grills, I see something like this:

Cast iron grates: Which side is in the correct orientation

This Weber Genesis features cast iron cooking grates. The grate on the left has the narrow, pointed side facing up; the grate on the right has the wide, flat side facing up.

Which orientation is correct?

The grate on the right is in the correct orientation. The wide, flat side of the grate should face up for maximum contact with food and for the best grill marks.

Cast iron grill grates in correct orientation

It’s easy to install grates in the wrong orientation when assembling a new Weber grill or when replacing porcelain enameled steel grates with cast-iron grates. But you won’t make this mistake because now you know what’s up!

Lab Tests Prove It’s Better To Cut Meat Across The Grain

Interior view of Porterhouse steak

Here’s a great video from the folks at Cook’s Illustrated magazine that describes their lab testing of cooked flank steak and strip steak and the relative force needed to cut both meats with the grain and across the grain.

Tests using a texture analyzer showed that cooked flank steak took 4 times the force to cut with the grain than across the grain. For cooked strip steak, it took almost 2 times the force to cut with the grain than across the grain. Most interestingly, it turns out that the force needed to cut both cooked flank steak and cooked strip steak across the grain is almost the same!

The Bottom Line: How steaks are cooked, to what internal temperature, and how they’re sliced after cooking have a huge impact on tenderness; and cheap(er) cuts like flank steak, skirt steak, and hanger steak can be almost as tender as expensive steaks when cooked and sliced properly.

Hope you enjoy the video!

Using An Instant-Read Thermometer For The Perfect Baked Potato

Baked potato

In my opinion, nothing goes better with a grilled steak than a tender, fluffy baked potato. I’ve always baked them in a 400°F oven for 45-60 minutes and then poked with a knife to determine doneness…sometimes without much success. I cut into the potato and find the center a bit under cooked.

The folks at Cook’s Illustrated magazine tackled the question of The Perfect Baked Potato in their January/February 2016 issue. They determined that the optimal internal temperature for a uniformly fluffy baked potato is 205-212°F. Cook’s suggests baking potatoes at 450°F for 45-60 minutes until the largest potato registers 205°F in the center.

So now you’ve got yet another reason to own a good quality instant-read thermometer! Next time you bake a potato, probe it to ensure the perfect internal temp!

Height Matters: How To Evenly Sprinkle Salt, Pepper & Rub On Meat

To evenly sprinkle salt, pepper or rub on meat, increase the height at which you hold your fingers or shaker.

Sprinkle salt or other seasonings from a height of 12 inches

According to America’s Test Kitchen Radio, sprinkling from a height of at least 12 inches results in a more even distribution than if you sprinkle from just a few inches above the meat. Place the meat on a rimmed baking sheet before sprinkling, then pat or roll the meat on the pan to pick up any excess seasoning.

Even distribution of salt and pepper on a pork chop

Testing Knives For Sharpness

Victorinox Cutlery 12-Inch Curved Cimeter KnifeIt seems counterintutive, but a sharp knife is actually safer in the kitchen and around the grill than a dull knife. When a knife is dull, we saw, hack or force it through whatever it is we’re trying to cut, and it’s in those moments that we lose control of the knife and cut ourselves. A sharp knife is easily controlled because it slices through meat or veg or bread smoothly and easily, and is therefore safer.

The folks at America’s Test Kitchen suggest that you test your knives for sharpness as follows: Grasp the top edge of a piece of printer paper firmly with one hand and draw the knife blade across the edge of the paper from heel to tip. The knife should slice easily through the paper with minimal effort.

Here’s a 3-second video clip showing how to do the knife sharpness test:

There are many ways to sharpen knives. One of the best electric sharpeners is the Chef’s Choice 130 Professional Knife-Sharpening Station ($150). I’ve used this sharpener for many years and it does a fine job.

Chef's Choice 130 Professional Knife-Sharpening Station

Less expensive options include the Chef’s Choice 464 Pronto Manual 2-Stage Diamond Hone Knife Sharpener ($39) and the AccuSharp 001 Knife Sharpener ($9).

Chef-Recommended Meat Doneness Temperatures

Here’s some good information from ThermoWorks, the makers of the highly accurate Thermapen instant-read thermometer, on chef-recommended meat doneness temperatures.

Note that all temperatures listed are peak temperatures, meaning that meat should be removed from the grill a couple of degrees below these temps and allowed to rise during a short resting period.

Beef, Veal & Lamb: Roasts, Steaks & Chops

  • Rare: 120-130°F
  • Medium Rare: 130-135°F
  • Medium: 135-145°F
  • Medium Well: 145-155°F
  • Well Done: 155°F and higher

Pork: Roasts, Steaks & Chops

  • Medium: 137°F
  • USDA-Done: 145°F
  • Well Done: 150°F and higher

And in case you’re wondering, here are the food safe minimum doneness temps for meats that pose a greater health risk if not cooked thoroughly.

Ground Meat: Beef, Veal & Lamb

  • 160°F

Chicken, Turkey & Duck (Whole or Pieces)

  • 165°F

The Secret To Moist Grilled Chicken

Moist grilled chicken halves

Brining. Salting. Marinating. Injecting. Buttering. Beer butting. (Is that even a word?) These are but a few of the methods that people use in an attempt to make moist, tasty chicken.

But I am now going to reveal to you the #1 Secret to grilling moist, delicious chicken every time you cook:

DO NOT OVERCOOK IT!

That’s right. Don’t overcook it. Get yourself a good instant-read thermometer and measure the internal temp during grilling. I don’t care how you season the bird or brine it or inject it…if you cook the breast meat to 160-165°F and the thigh meat to 170-175°F and then remove the chicken from the grill, I guarantee* you will have moist, delicious meat.

Yes, brining chicken provides a margin of error, allowing you to cook to higher internal temps than those listed above and still achieve moist meat, and it can flavor the meat, too. But you can get moist meat and perhaps more real chicken flavor if you don’t brine and keep the internal temp within the ranges above.

So season your chicken well, use your thermometer, don’t overcook it and tell us how it turns out on The Virtual Weber Bulletin Board. And remember, we like to see your photos!

* Guarantee not valid in the Americas, EMEA, Asia-Pacific, polar regions, or territorial & international waters.