
Are the gas grill valves in your old Weber Genesis or Summit grill stiff and hard to turn? Do they no longer lock in the Off/High/Medium/Low positions? Do they not pop back up after being pushed down?
If you answered “Yes” to any of these questions, you can probably solve the problem by cleaning and lubricating the gas valves.
Supplies Needed
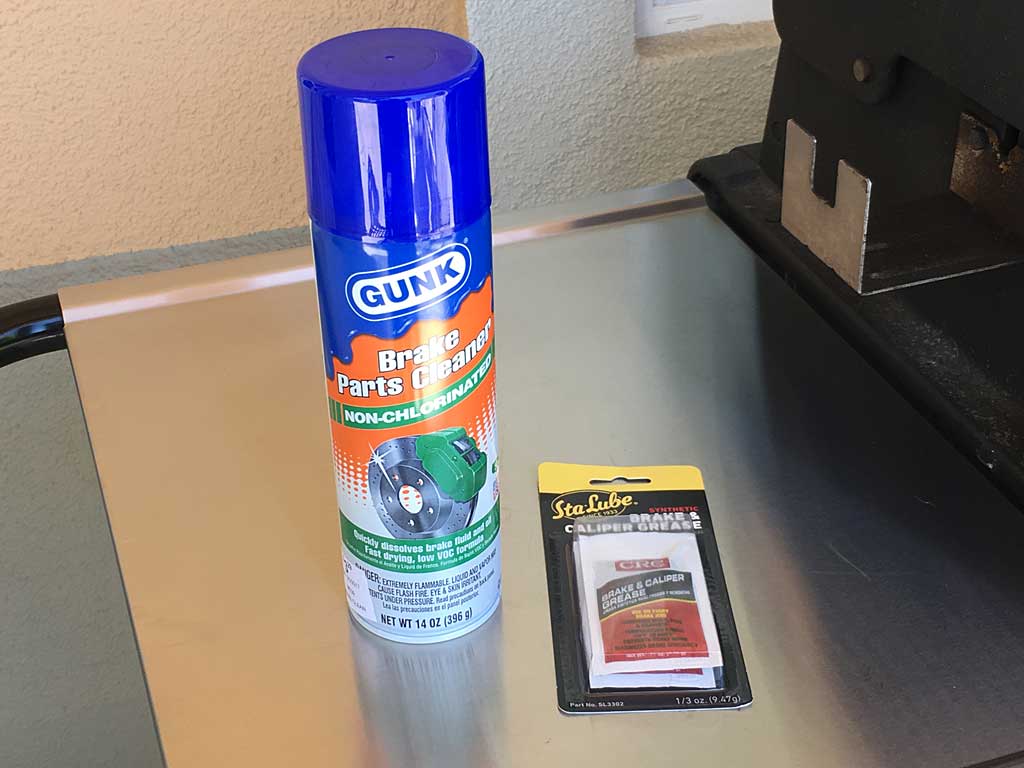
Cleaning and lubricating the valves is easy to do and it doesn’t require any replacement parts. Here are the supplies you’ll need:
- Cleaning solvent, e.g. brake parts cleaner in a spray can
- Black molybdenum-based synthetic brake & caliper grease
- Phillips screwdriver with fine tip
- Rags and cotton swabs for cleaning parts with solvent
I used a non-chlorinated brake cleaner like this one, as chlorinated brake cleaners may produce some very nasty gasses when heated.
The black moly grease is necessary because it withstands temps up to 600°F. Don’t substitute white lithium grease, spray lubricants, or any lubricant containing silicone.
Video: Cleaning & Lubricating Gas Grill Valves
Here’s a video that shows the process of cleaning and lubricating gas valves on a 2002 Weber Summit 450 grill. The cleaning and lubricating process will be about the same for most older Genesis and Summit gas grills.
What will be different, depending on your model, is how you remove the control panel in order to access the valves. In most cases, you can look under the grill and figure out how it comes apart. If you’re not sure, consult the owner’s manual for details. (If you don’t have a copy of the manual, most can be downloaded from Weber.com or other sites on the Internet). In the owner’s manual, find the step in the assembly instructions where the control panel and knobs are installed and simply reverse those steps.
Cleaning & Lubricating Process
Make sure the gas supply is turned off at the tank. Open a valve to evacuate any residual gas in the manifold, then make sure all valves are in the OFF position.
Remove the burner control knobs, control panel, and any other parts necessary to access the manifold assembly where the valves are located.
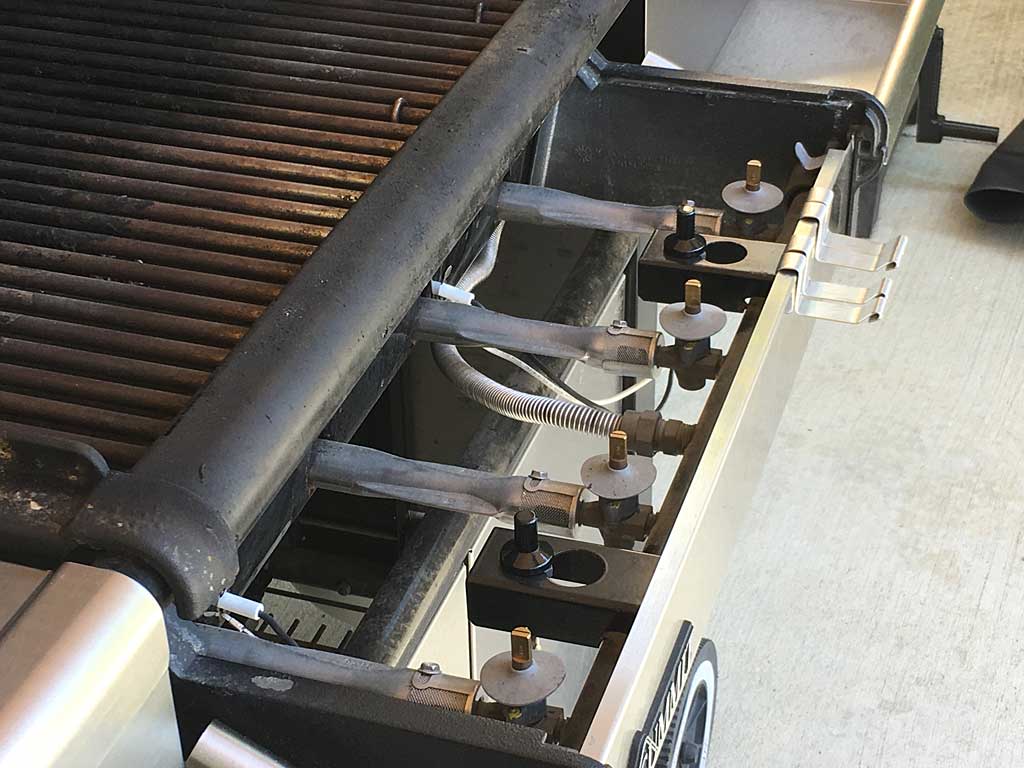
Remove the round gray silicone dust cover from each valve by pulling it straight up and off the valve stem.
From this point on, work on one valve at a time! Don’t mix and match parts between valves.
Remove the two small screws from the valve cover, taking care to not strip the heads.
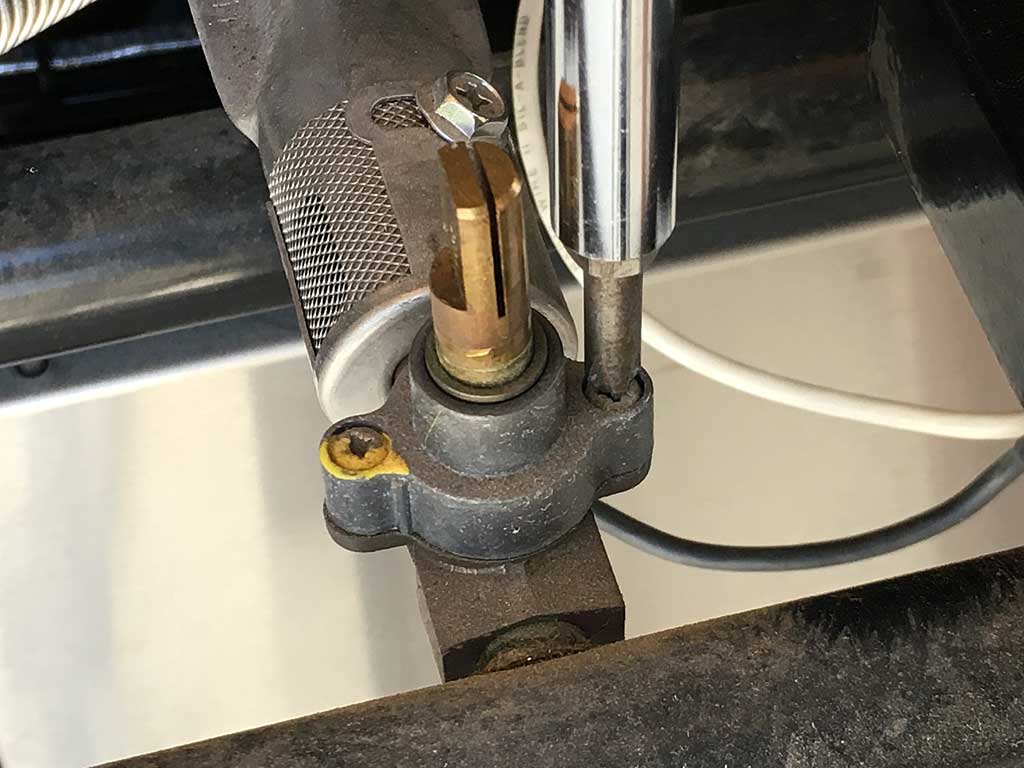
One of the screw heads may be dotted with paint. In most cases this does not interfere with removing the screw, but sometimes the paint fills the slots in the screw head. If so, use a sharp-tipped knife to dig the paint out of the screw head, then remove with the screwdriver.
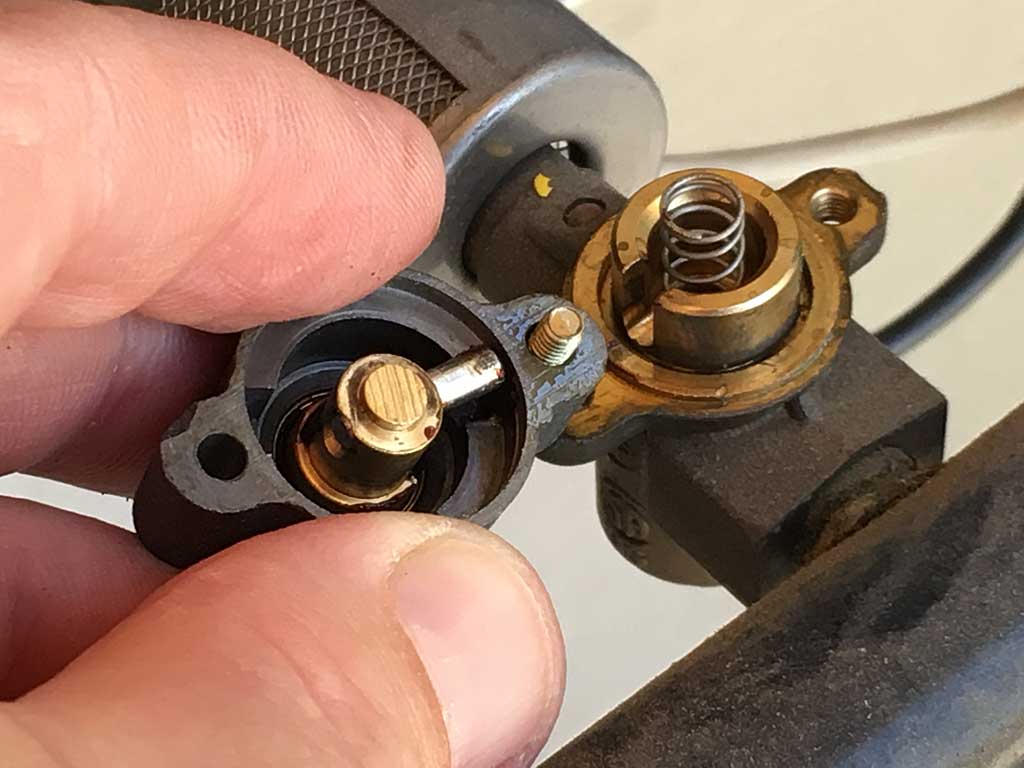
As you loosen the second screw, a spring inside the valve will push up against the valve cover. Carefully remove the second screw and remove the valve cover and stem.
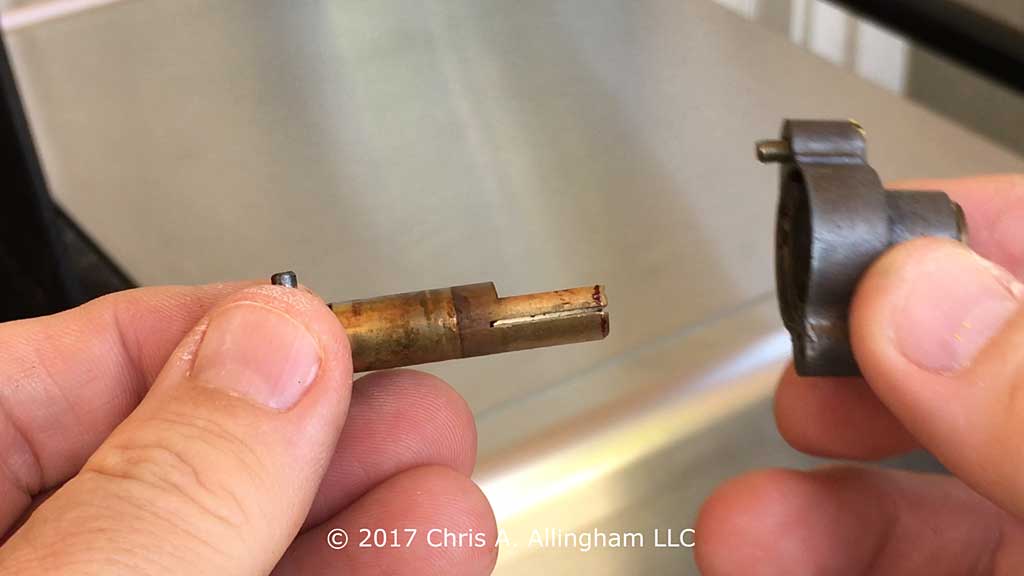
Take a moment to become familiar with the orientation of the stem inside the valve cover and the brass valve and spring within the valve body. It’s hard to put the parts back together wrong, but if you have any doubts, take a couple of photos on your smartphone.
Set the valve cover and stem aside.
Remove the spring from the valve body and set it aside.
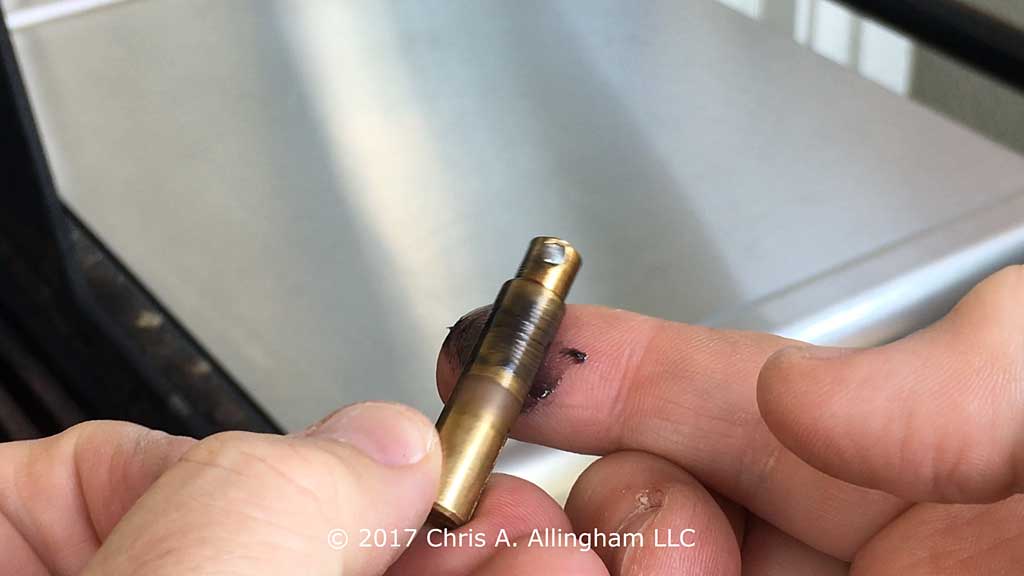
The part under the spring is, for lack of a better term, the “valve cone”—a cone-shaped brass part with holes machined into it that control the flow of gas into the burner.
With the valve cover removed, the only thing holding the valve cone into the valve body is old grease. Grasp the valve cone between your thumb and index finger and give it a “turn and pull”. It should come right out. Set the valve cone aside.

Apply solvent to a cotton swab and clean the inside of the valve body.
Apply solvent to a rag and clean the valve cone.
Apply a very thin coat of black moly grease to the sides of the valve cone and place it back into the valve body in the same orientation as you originally found it.
Place the spring back into the top of the valve cone.
Turning your attention to the valve cover, remove the valve stem by pushing it through the cover.
Apply solvent to a rag and clean the stem.
Apply solvent to a cotton swab and clean the inside surface of the cover where it contacts the stem.
Apply a very thin coat of black moly grease to the sides of the stem and place it back into the valve cover, aligning the pin to the OFF position.
Place the valve cover back onto the valve body and replace both screws, making sure to tighten—but not overtighten—them.
Repeat the cleaning and lubricating process for the remaining valves on your grill.
Replace the round gray silicone dust covers on each valve stem. They can be cleaned with warm soapy water or Simple Green before replacing.
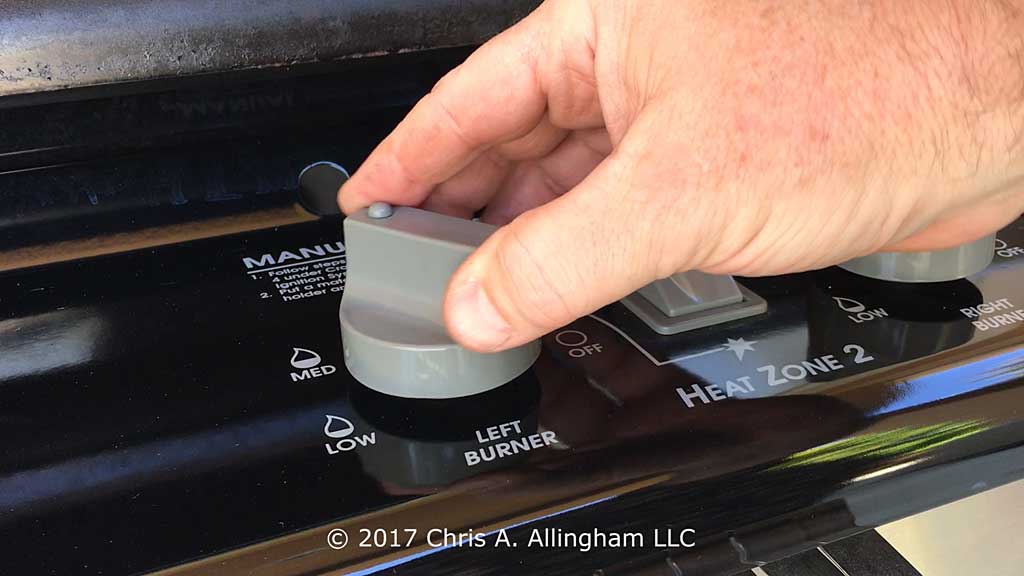
Reinstall the control panel and burner control knobs.
Check the function of each valve. They should turn smoothly, pop back up after being pushed down, and lock into the Off/High/Medium/Low positions.
Special Thanks
Thanks to The Virtual Weber Bulletin Board member LMichaels for posting information on the supplies needed and steps necessary to clean and lubricated Weber gas grill valves.