
Introduction
It’s common to hear someone say that their old Weber gas grill is still going strong, but it doesn’t light properly. They have to light it with a match through the manual lighting hole in the front of the grill.
Sadly, it’s also common for some grill owners to think it’s time to toss and replace an old grill when it won’t light.
Difficulty in lighting is a common problem as a gas grill gets older. The solution is to install a new igniter kit. Doing so is cheap and easy on older Weber grills and just slightly more expensive and difficult on more recent Weber grills. Either way, it’s cheaper than buying a new grill and it’s a job that I’m confident you can do…so read on!
Buying The Correct Igniter Kit Is Key
Weber has used a variety of igniter kits over the years for different grills. Some kits are mechanical, some are electronic. Some include multiple igniters, some include just one. The wires may be longer in some kits and shorter in others. It’s important to get the right kit for your grill because even kits that look alike may not work properly in your specific grill.
Weber does not list the replacement igniter kit part number in your grill’s owners manual because these part numbers may change over time. The best way to make sure you get the right kit is to call Weber Customer Support at 800-446-0171. Give them your grill’s model name and serial number and they’ll tell you which part number you need. Alternatively, if you’re buying at a home center or online, read the box label or product description carefully to make sure the kit covers your specific grill model and year.
Types of Ignition Systems
Prior to the mid-2000s, Weber used a mechanical piezo ignition system in gas grills. When you depress the ignition button, a spring-loaded hammer hits a crystal, generating a high voltage discharge that travels through wires to a ceramic igniter in the firebox, creating a spark next to the burner tube and lighting the gas. These older systems make a loud metallic “bang” noise when you depress the rectangular ignition button. Each time you depress the button, a spark is generated.
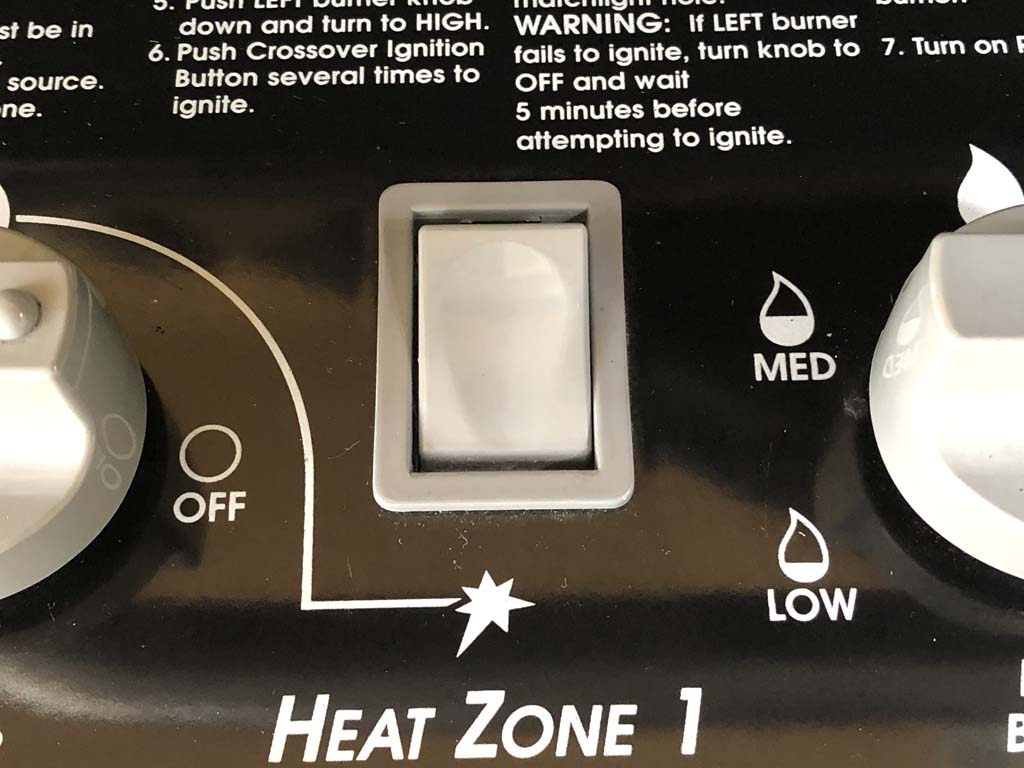
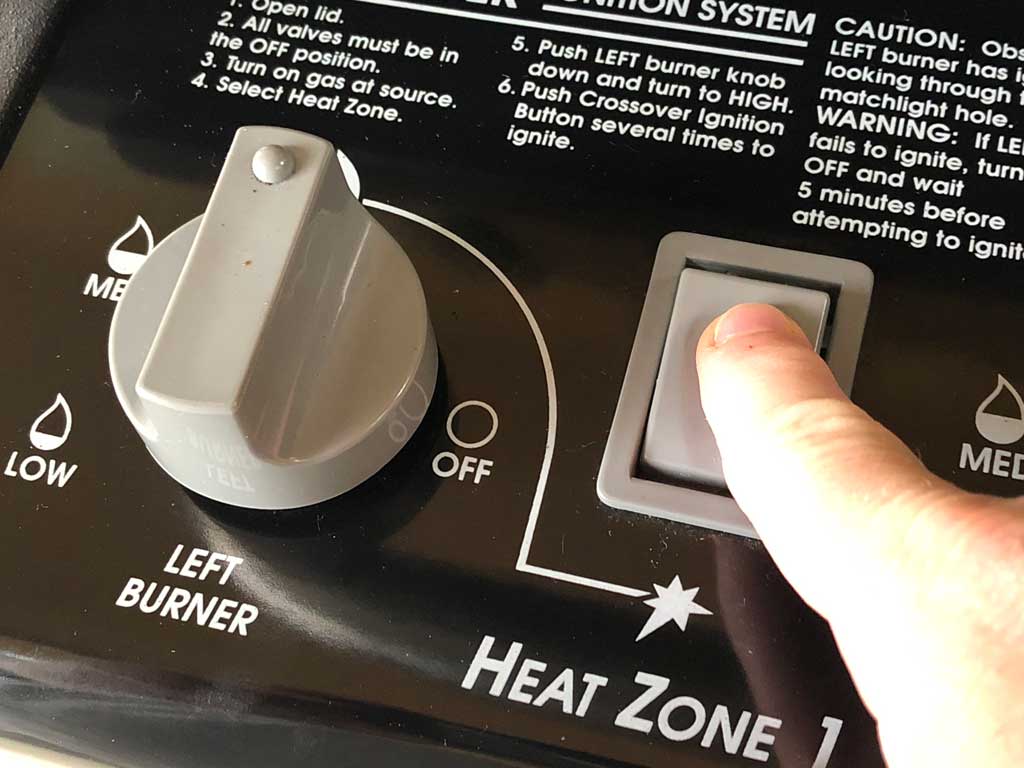
Since the mid-2000s, Weber has used a combination of mechanical piezo ignition systems and battery-powered electronic ignition systems in gas grills. The mechanical ignition system is known as “Snap-Jet” and is integrated into each gas burner control knob. When the knob is turned to the START/HI position, the mechanical igniter generates a spark that lights the gas. The name “Snap-Jet” is derived from the loud “snap” noise that occurs when the knob is turned.

You’ll find Snap-Jet igniters on Summit gas grills manufactured from 2003 until time of this writing. On these grills, the igniters are integrated into the gas manifold. If you have a bad igniter, you have to replace the entire gas manifold assembly, a part that costs around $100 at the time of this writing. Not such a great design from a maintenance perspective!
On Genesis and Spirit grills made prior to 2017, the electronic ignition system is called “Electronic Crossover Ignition”. Starting with Genesis II grills in 2017 and Spirit II grills in 2018, the system is called “GS4 Infinity Ignition”. These systems consist of a battery-powered control module with wires and igniters at each burner. They make a “tick-tick-tick” noise when the ignition button is depressed.
As for Weber Q gas grills, the less expensive models use a mechanical piezo igniter button, while more expensive models use an electronic battery-powered igniter. Both are similar to what’s used in the big gas grills.
The Go-Anywhere gas grill uses a mechanical igniter.
There are a bunch of different versions of these electronic systems, so making sure you buy the right replacement is critical.
Popular Mechanical Igniter Replacement Kits
The two most popular mechanical igniter replacement kits are:
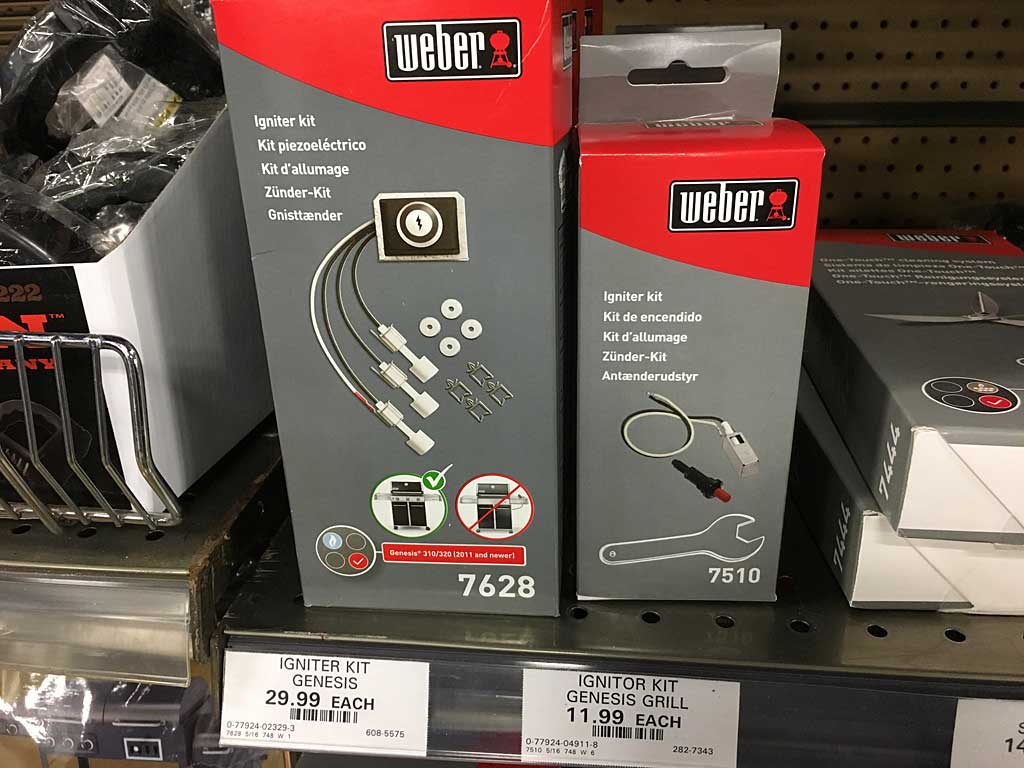
- Weber 7509 Igniter Kit: For Spirit and Genesis (pre-2002), Platinum I and II, Genesis 1000 to 5500, Genesis Silver and Gold (pre-2002), and Genesis Platinum. Does not fit Spirit front-mounted control panel models.
- Weber 7510 Igniter Kit: For Genesis Silver/Gold/Platinum gas grills (2002 and newer) and Spirit 200/300 gas grills (2007-2008). Does not fit Genesis Silver/Gold C models after 2003.
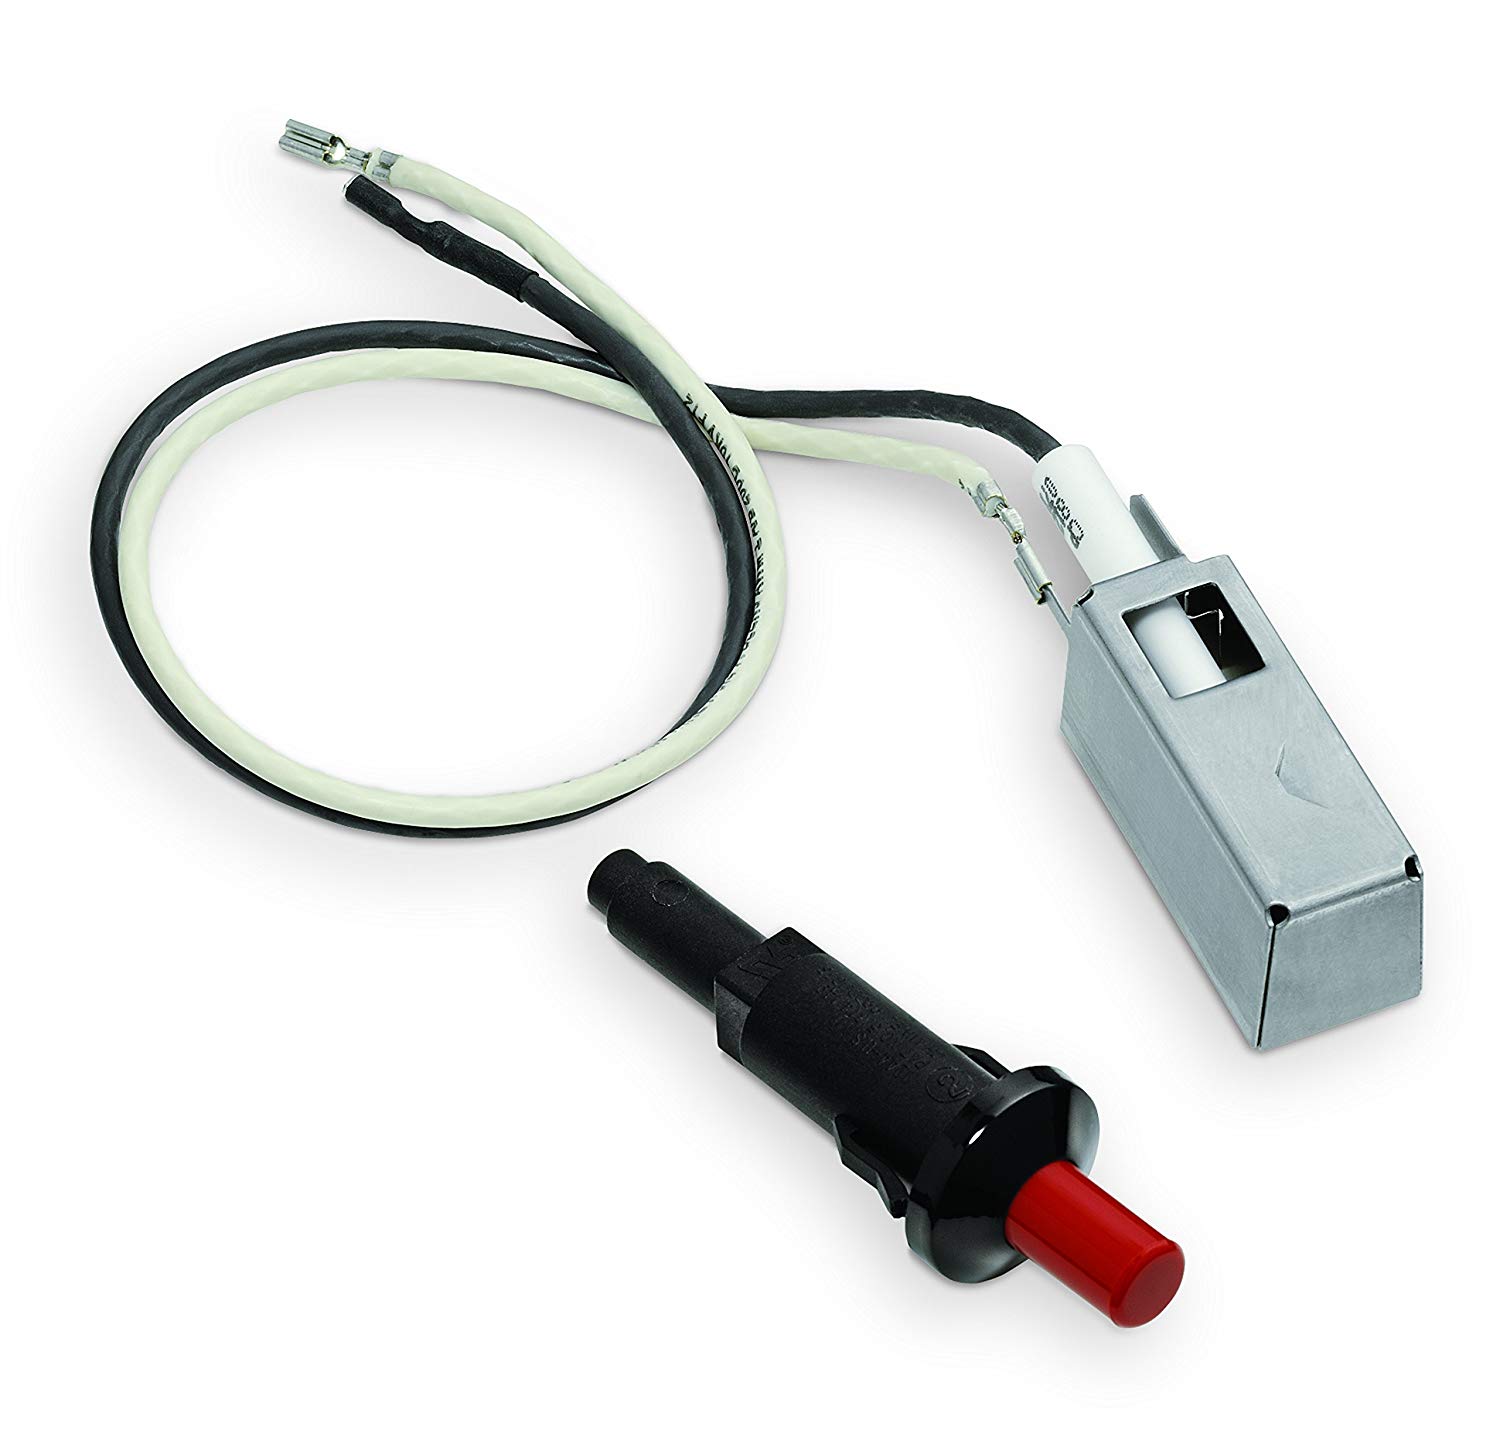
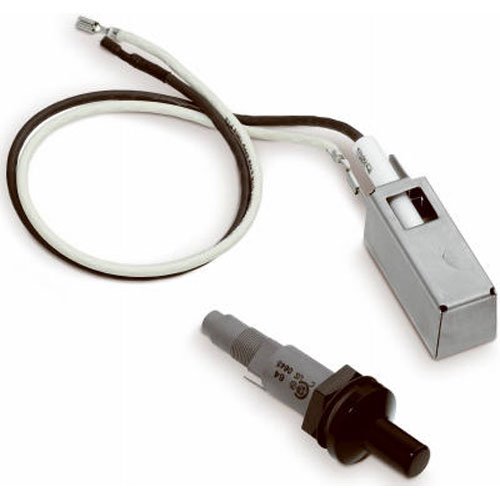
These kits come with an igniter button that generates the high voltage discharge, a ceramic igniter that makes the spark, a black wire and a white wire, a sheet metal gas catcher that collects gas (making it easier for the spark to light the grill), and installation instructions. The black wire is connected at one end to the ceramic igniter at the factory.
If you have a grill with a mechanical igniter that’s not listed above, call Weber Customer Support at 800-446-1071 to determine the correct igniter for your grill. For example, I’ve got a 2002 Weber Summit 450 grill with two mechanical igniters and the replacement part is Weber 901—a part that looks identical to the Weber 7509 shown above, but there’s some difference between the two…perhaps the wires are a different length.
Example of Mechanical Igniter Installation
I’m going to demonstrate how I replaced the igniters in my 2002 Summit 450. The steps are similar on most older Weber grills:
- Remove the burner control knobs and control panel to access the igniter parts. Remove the cooking grates and Flavorizer bars to access the gas catcher.
- Remove and replace the igniter parts and gas catcher.
- Test the new parts.
- Put the grill back together.
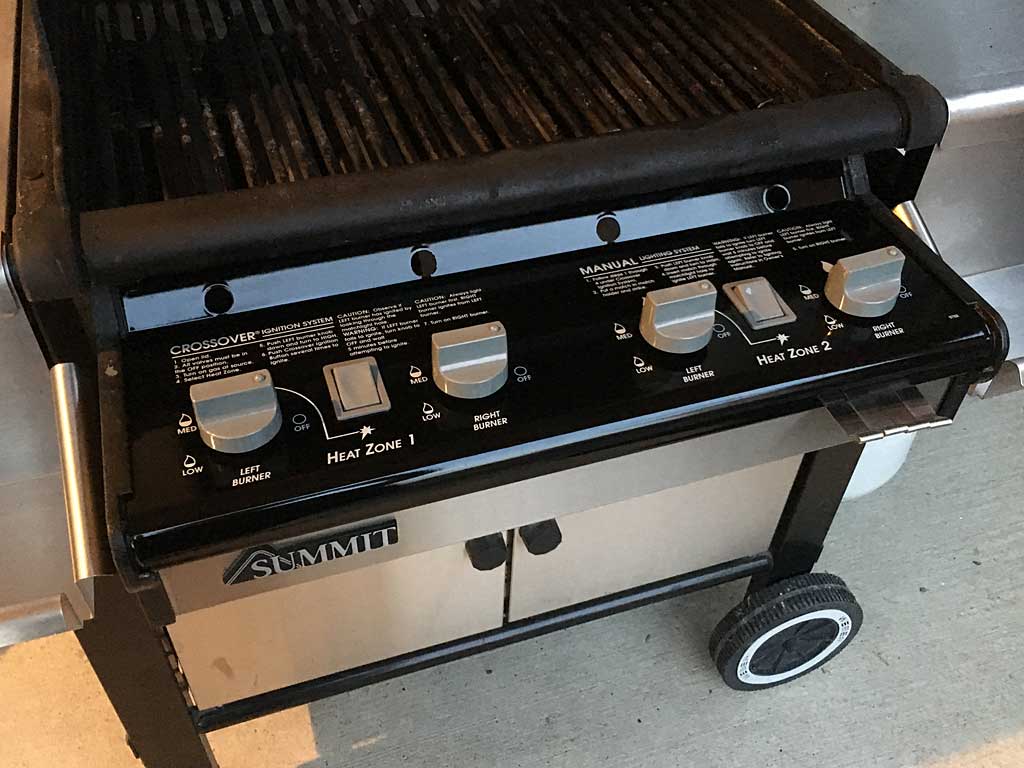
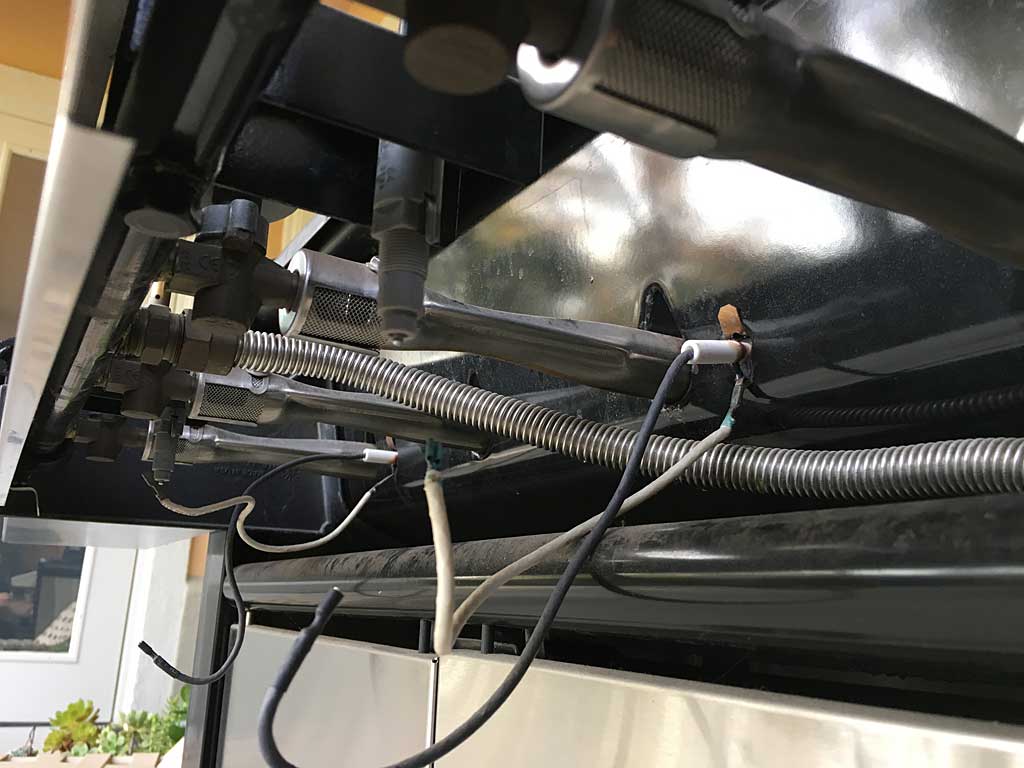
On my Summit, the knobs and control panel are on the front of the grill and there are two igniters to replace:
On other grills like the popular Genesis 1000, the knobs and control panel are on the right side of the grill and there’s only one igniter to replace:
That’s my 1992 Genesis 2 in the photo above, now being used by my parents. Here’s how the igniter is configured on that grill, shown with the control panel removed. This is the same on Genesis 1-5 and 1000-5000 grills.
Someday I’ll photograph the replacement of the igniter in that grill and post them here. Until then, the photos that follow from my Summit igniter replacement will have to do.
Step 1: Verify Kit Contents
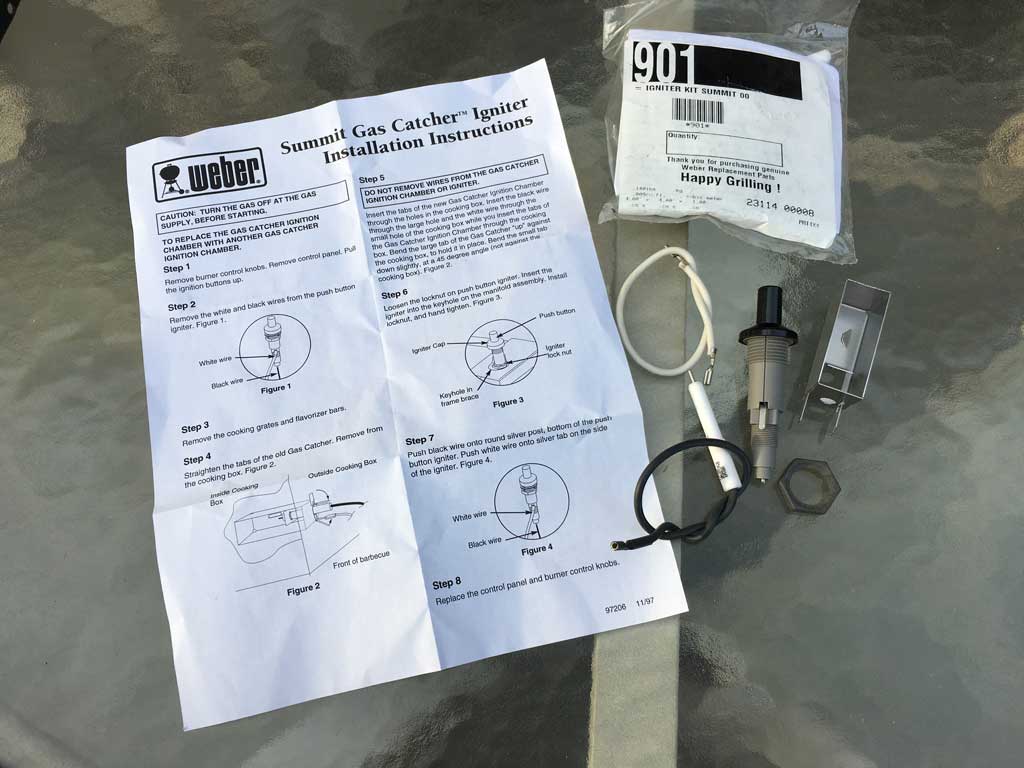
Open the igniter kit and make sure all the parts are present. Read the instructions before attempting the replacement.
Step 2: Remove Knobs, Control Panel, Grates & Flavorizer Bars

Pull up firmly on each knob. They’re held in place by friction, but may resist if they haven’t been removed in a long time or ever.
On the grill shown here, the control panel is removed by pulling up on the front edge then sliding it out toward you. On other grills, remove the two screws that hold the panel in place, then lift it out.
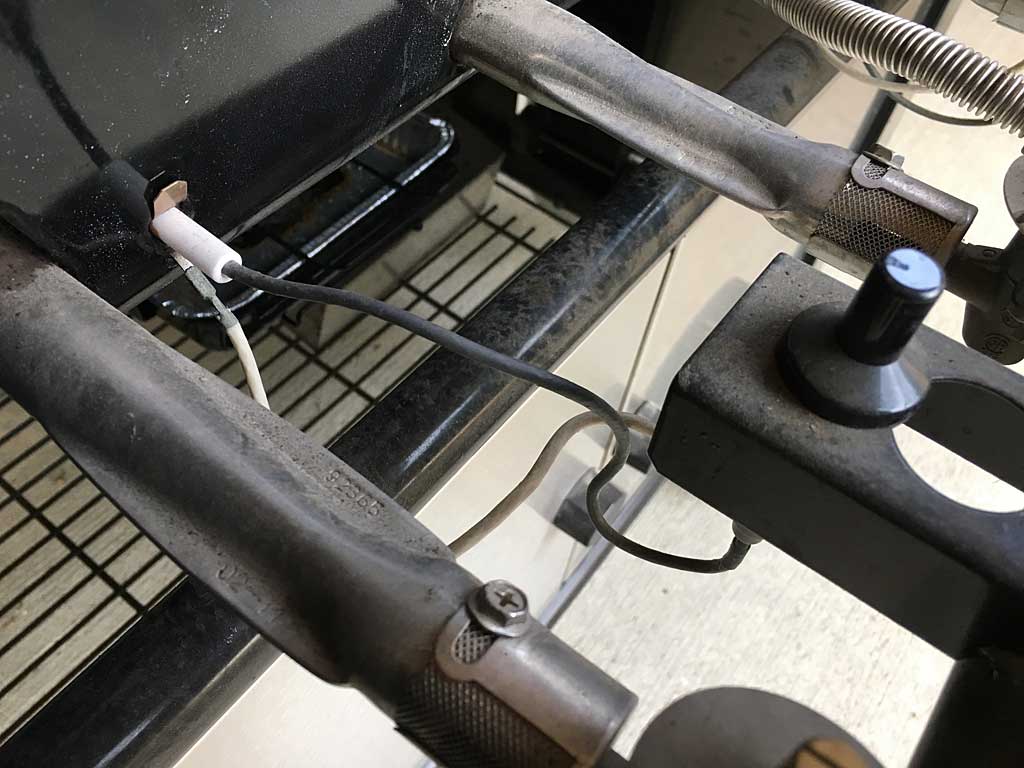
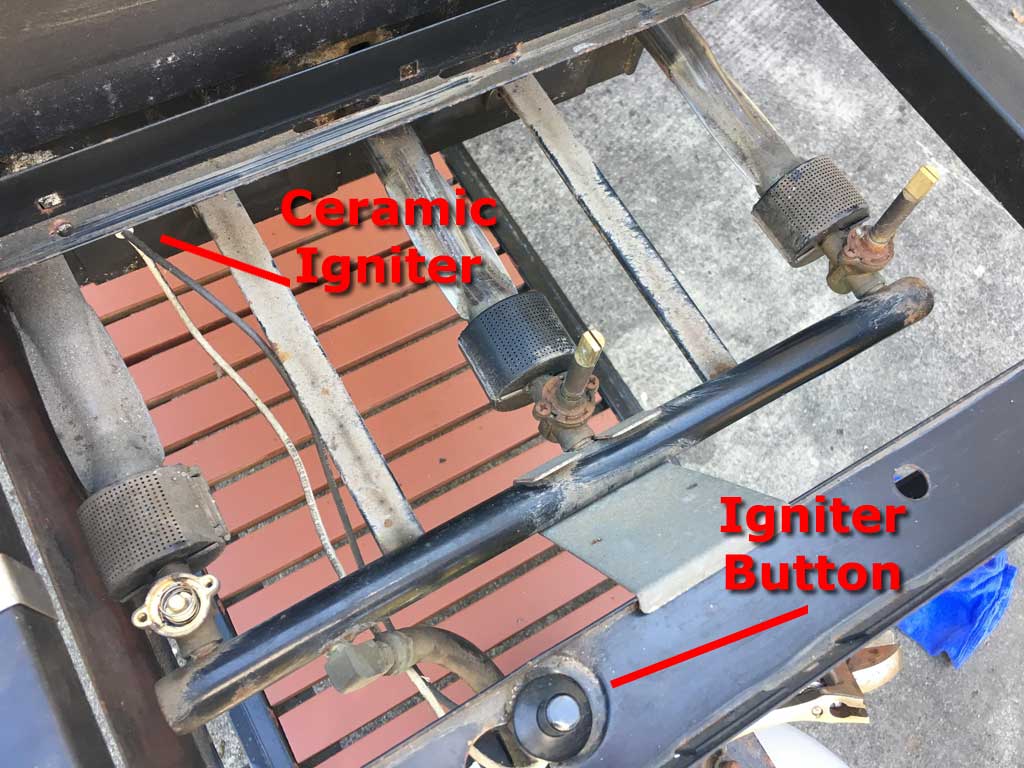
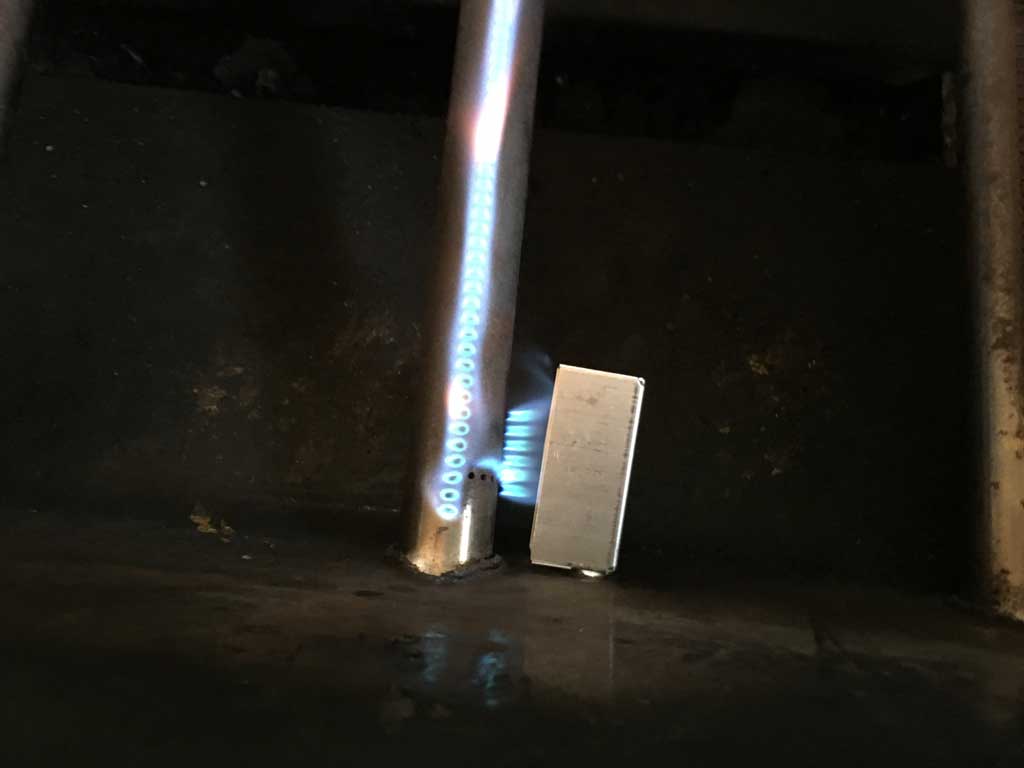
Now you can see the igniter button, the white ceramic igniter that sticks into the firebox, and the black and white wires connecting the two parts.
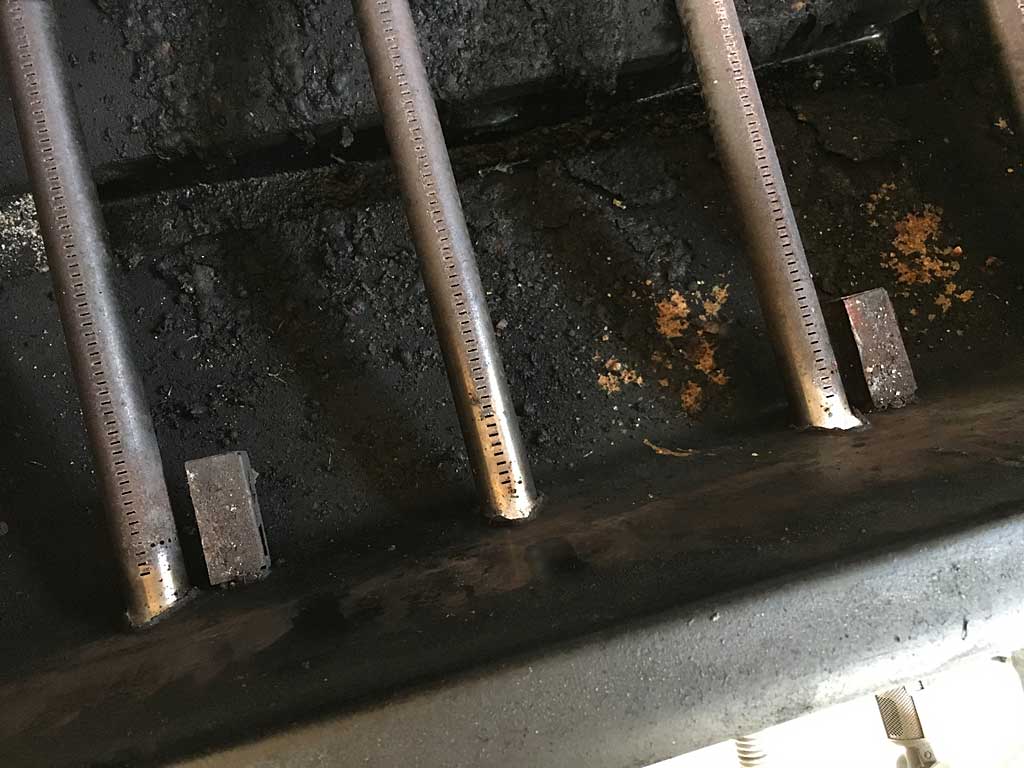
Inside the grill, remove the cooking grates and Flavorizer bars. Now you can see the sheet metal gas catcher that houses the ceramic igniter and collects gas for the spark to ignite.
Now is a good time to brush off the burners and punch out any clogged holes with an opened paper clip or small eyeglass screwdriver. These steps are illustrated in my Spring Cleaning post.
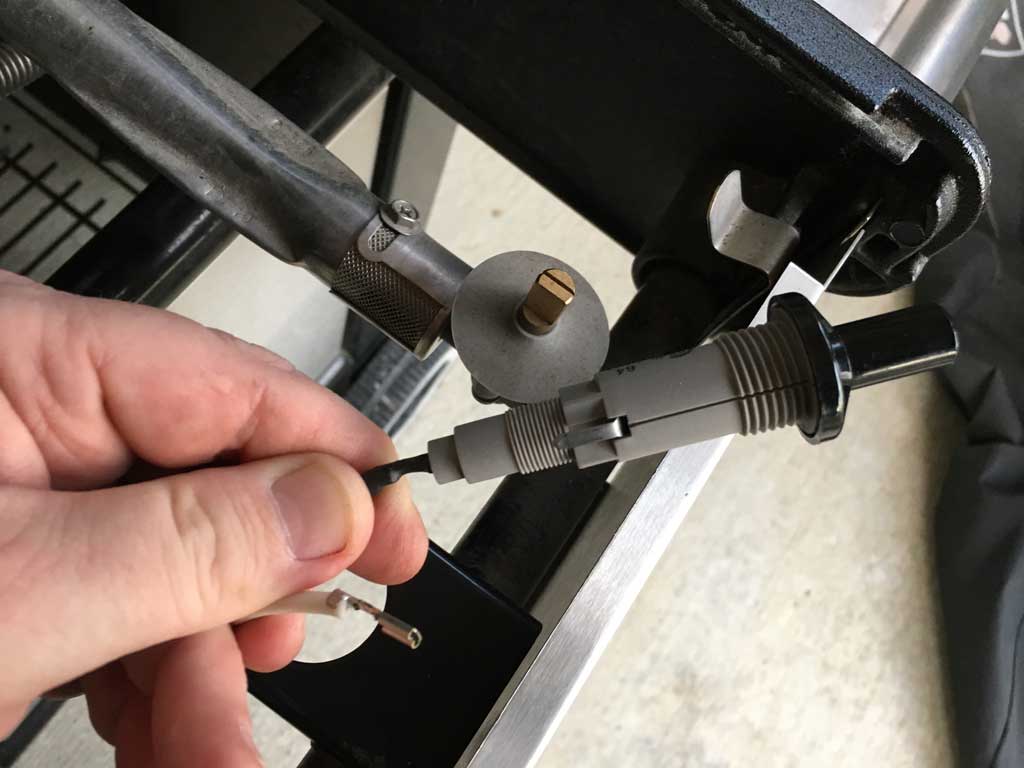
Looking under the igniter button, you can see how the black and white wires connect to it. The black wire inserts into the bottom of the igniter button and the white wire slides onto a connector on the side. At the other end, the black wire is connected to the ceramic igniter at the factory and the white wire slides onto a connector on the edge of the gas catcher.
Step 3: Remove The Old Igniter
Pull the black and white wires off the igniter button.
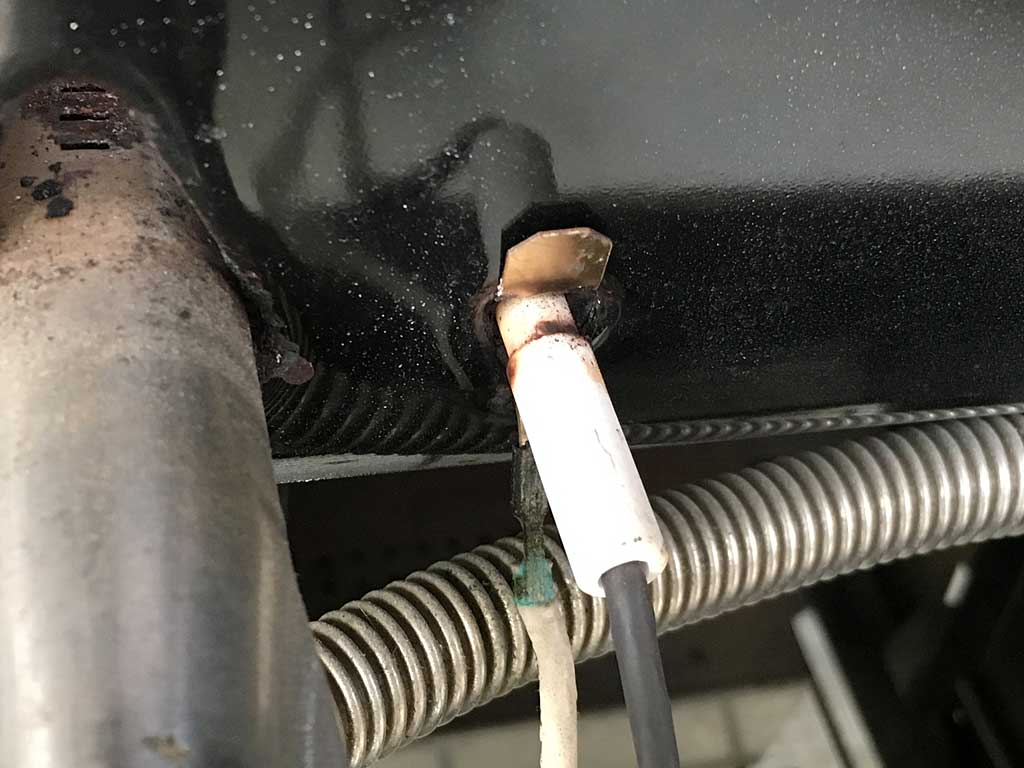
Find the metal tab on the gas catcher above the ceramic igniter.
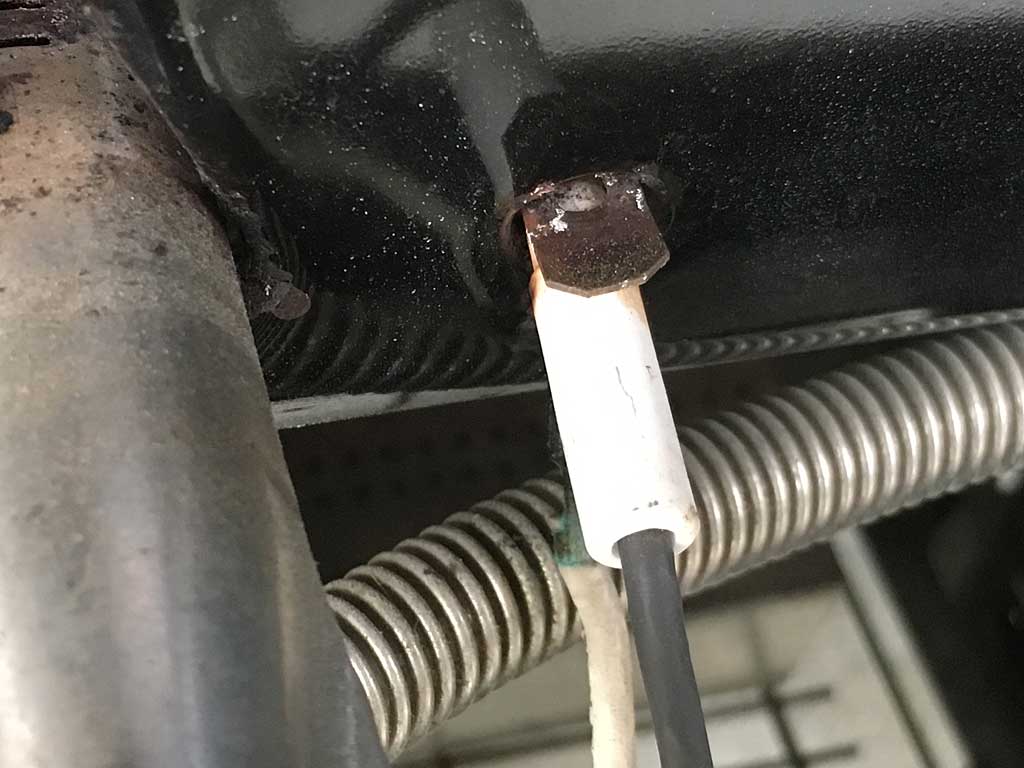
Fold the tab DOWN and the white wire connector UP to free the gas catcher box from the firebox.
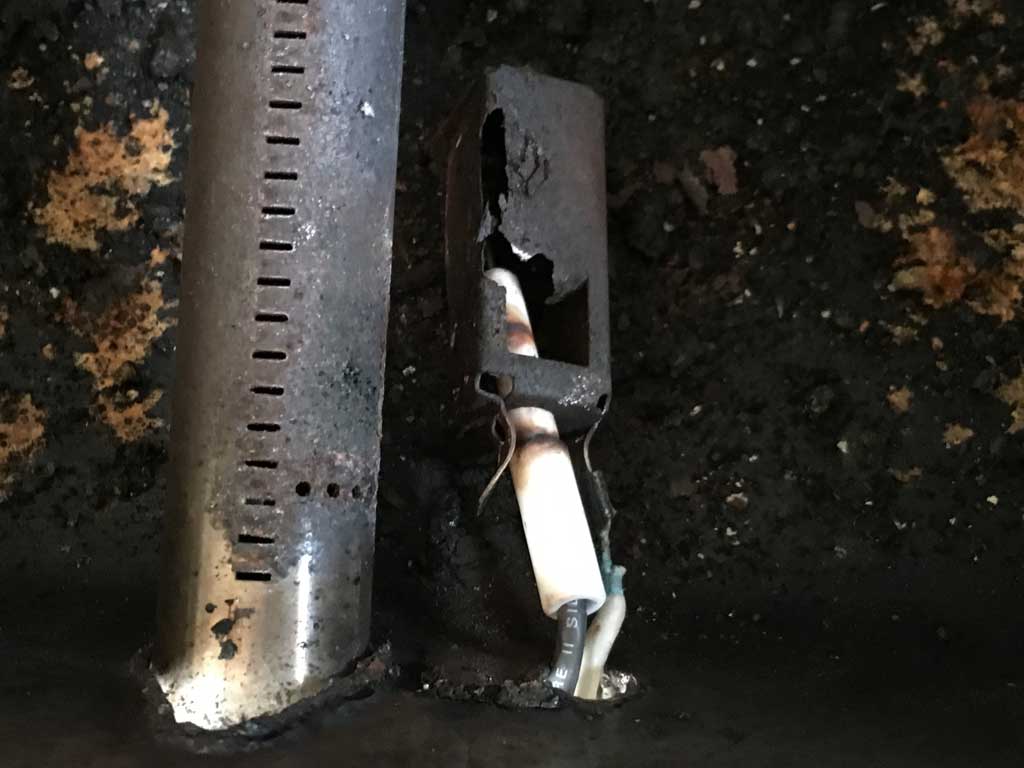
Push the old igniter through the firebox to remove it.
Remove the igniter button by loosening the nut under the button and sliding the button out of the metal frame.
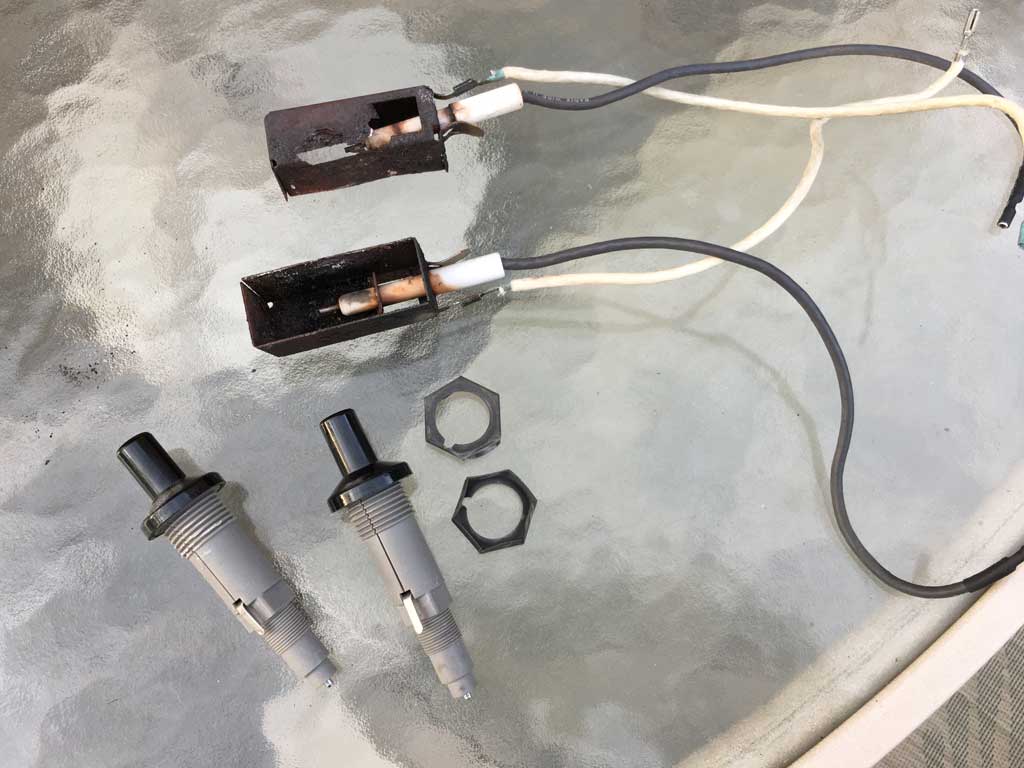
Here’s a look at the two igniters removed from my Summit 450. Again, your older Genesis or Spirit has just one igniter.
Step 4: Install New Igniter
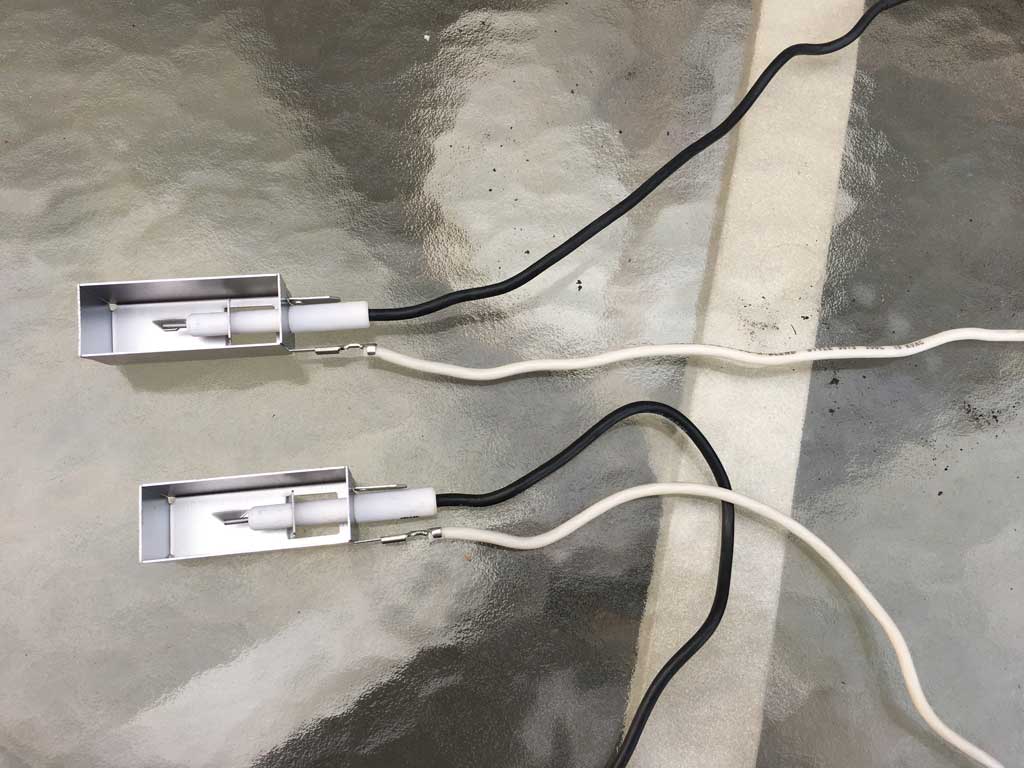
Insert the ceramic igniter into the gas catcher. Attach one end of the white wire to the connector on the gas catcher.
Thread the two wires through the firebox opening. Push the gas catcher into the opening as far as it will go, with the metal tab facing UP and the white wire facing DOWN.
Fold the tab ALL THE WAY UP and the white wire connector PARTIALLY DOWN to secure the gas catcher to the firebox.
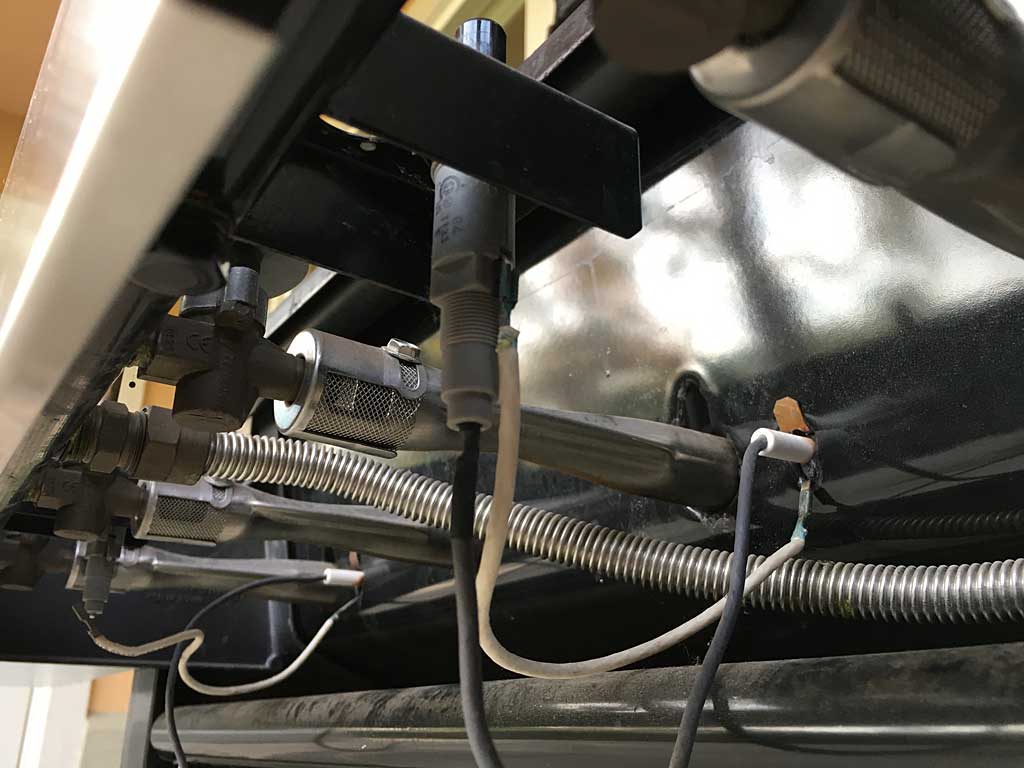
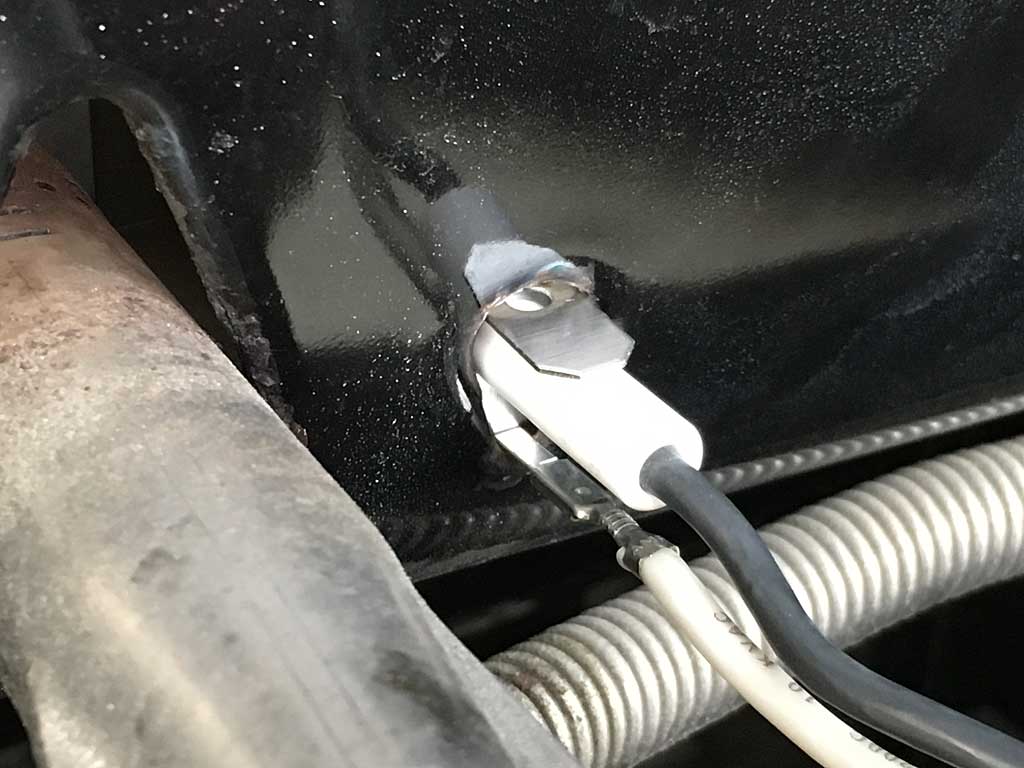
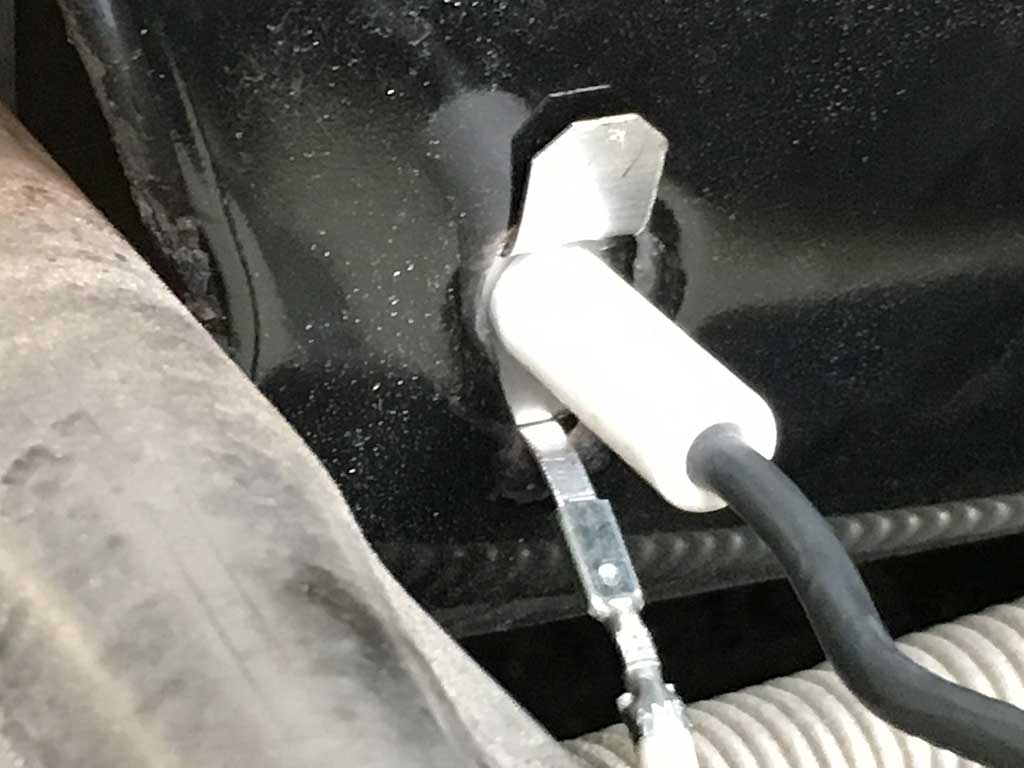
Here’s how the gas catcher looks inside the firebox.

To finish the installation, run the loose ends of the wires through the nut.
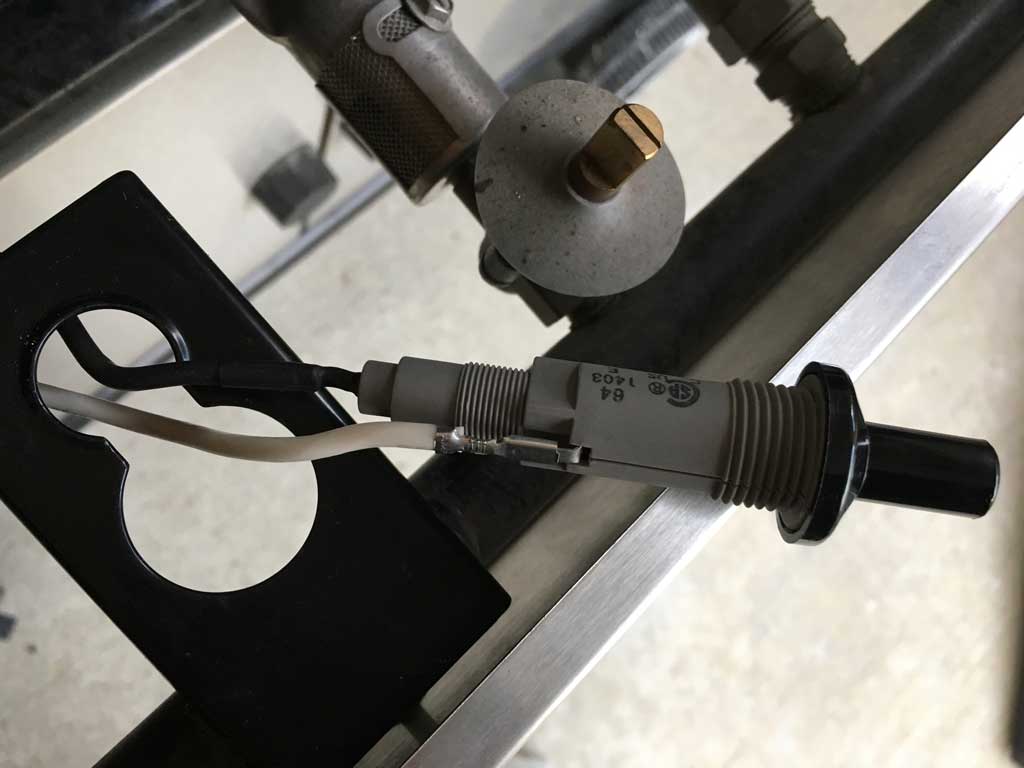
Press the black wire into the bottom of the igniter button and slide the white wire onto the connector on the side of the button.

Mount the igniter button in the metal frame and tighten the nut.
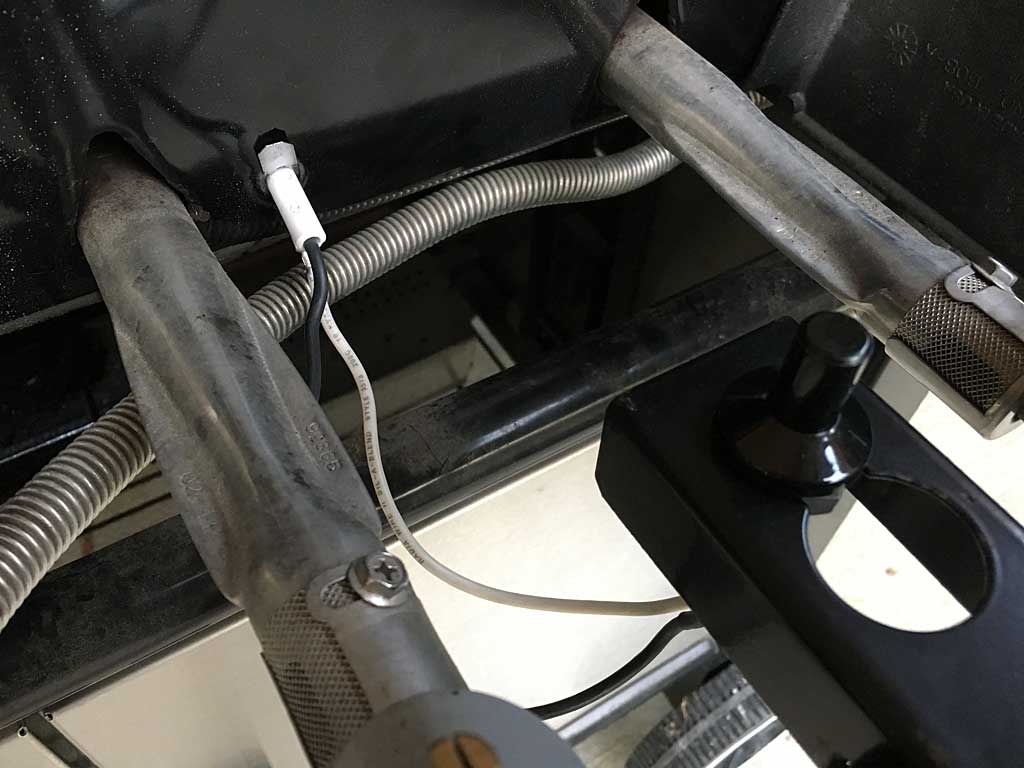
Here’s a look at the finished parts installation.
Step 5: Test The New Igniter
Place a control knob on each valve stem and make sure all valves are in the OFF position. Turn on the gas supply to the grill. Turn the appropriate valve to the LIGHT position and depress the ignitor button. Check for spark and ignition of gas. If you don’t get ignition, check the wire connections and retest.
Step 6: Reassemble The Grill
Reverse your earlier steps…replace and fasten the control panel and replace the knobs. On the grill shown here, place the back edge of the panel into the slot and slide it all the way in, then gently lift the front edge of the panel, push back, and release to lock it in place.
To make the knobs easier to remove in the future, spray a small amount of silicone lubricant inside each knob before pressing them onto the valve stems.
Replace the Flavorizer bars and cooking grates.
Now, take a step back and admire a job well done!
Electronic Igniter Installation
These installations are a bit more complicated and entail more steps—removing more screws to remove the control panel and sometimes a heat shield behind the panel, then unscrewing and removing the electronic control model and removing igniters at each burner, then installing the new igniters and control module, connecting and routing the new wires, testing your work, and buttoning everything back up.
This article at PrettyHandyGirl.com illustrates the replacement of the electronic ignition system on the popular Weber Genesis E-310. It will give you a good sense of the amount of work involved. Nothing too difficult, but it takes the right igniter kit and some time and patience.
Buy Genuine Weber Replacement Parts
If you shop online, you’ll come across many third-party igniters for Weber grills. For the mechanical igniters, the price difference may be only five bucks. For the electronic systems, a third-party kit may cost half as much as the genuine Weber part.
You know what I’m going to tell you. Why take the risk? Buy the genuine Weber part!