Weber 6409 Salt & Pepper Shakers

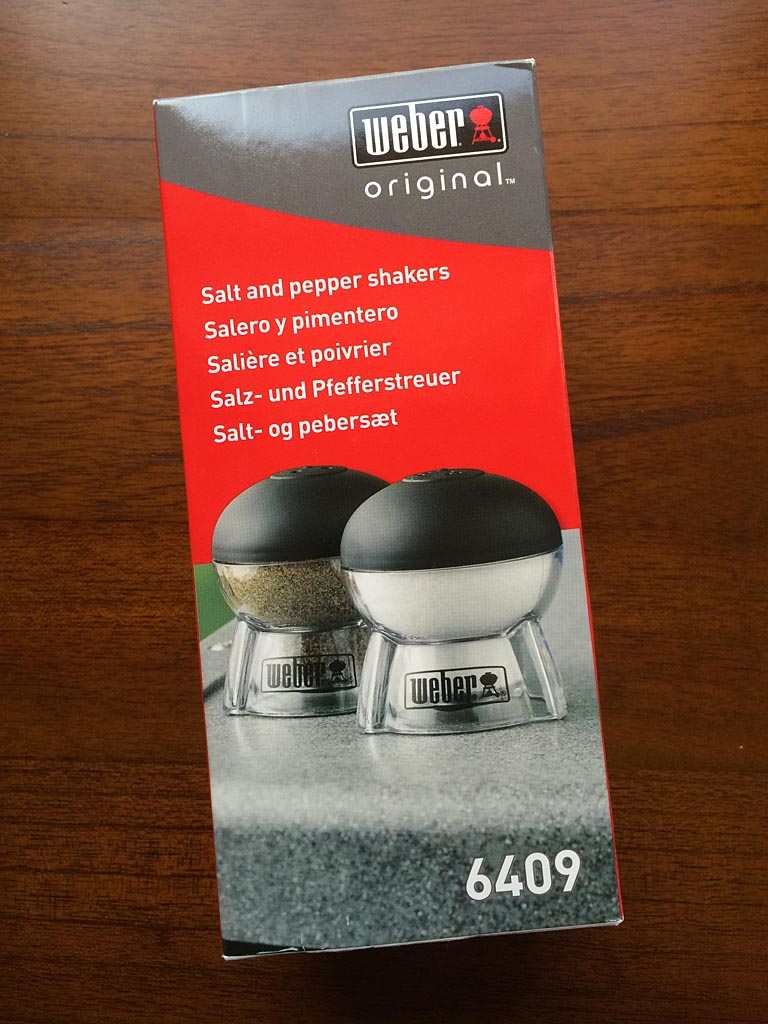
Review of Weber 6409 Salt and Pepper Shakers

Weber 6409 Salt & Pepper Shakers

Pros:

  • Clear acrylic design shows fill level
  • Good capacity
  • Catches overflow during refilling
  • Fun iconic Weber kettle shape

Cons:

  • Cannot close the shakers for storage
  • Must cover holes during refilling
  • Kosher salt and coarse-ground black pepper dispense a bit slowly

Filled Weber salt & pepper shakers

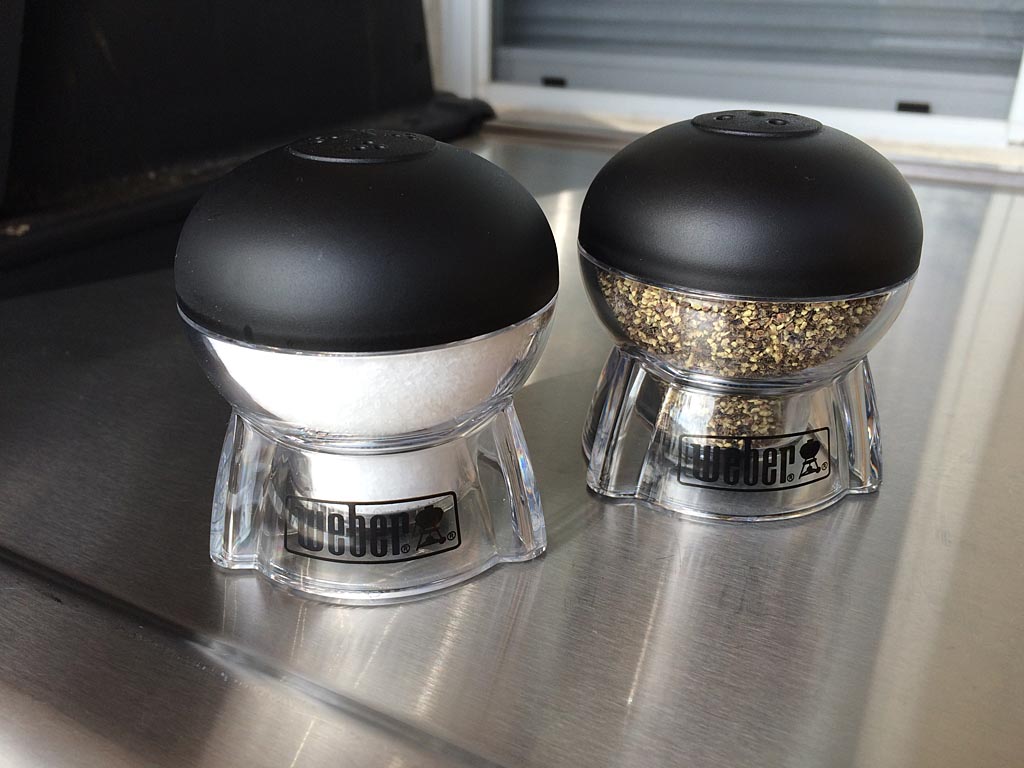
The Weber 6409 Salt & Pepper Shaker Set is fun and functional. If you’re a Weber fan, you’ll appreciate the way these shakers mimic the iconic Weber kettle grill, and at $5.99 for the pair, they’re not a bad deal, either.

These shakers hold a good amount of salt & ground black pepper. The clear acrylic construction is not only durable and easy to clean but allows you to see when each shaker needs a refill.

Upside down view of silicone stopper

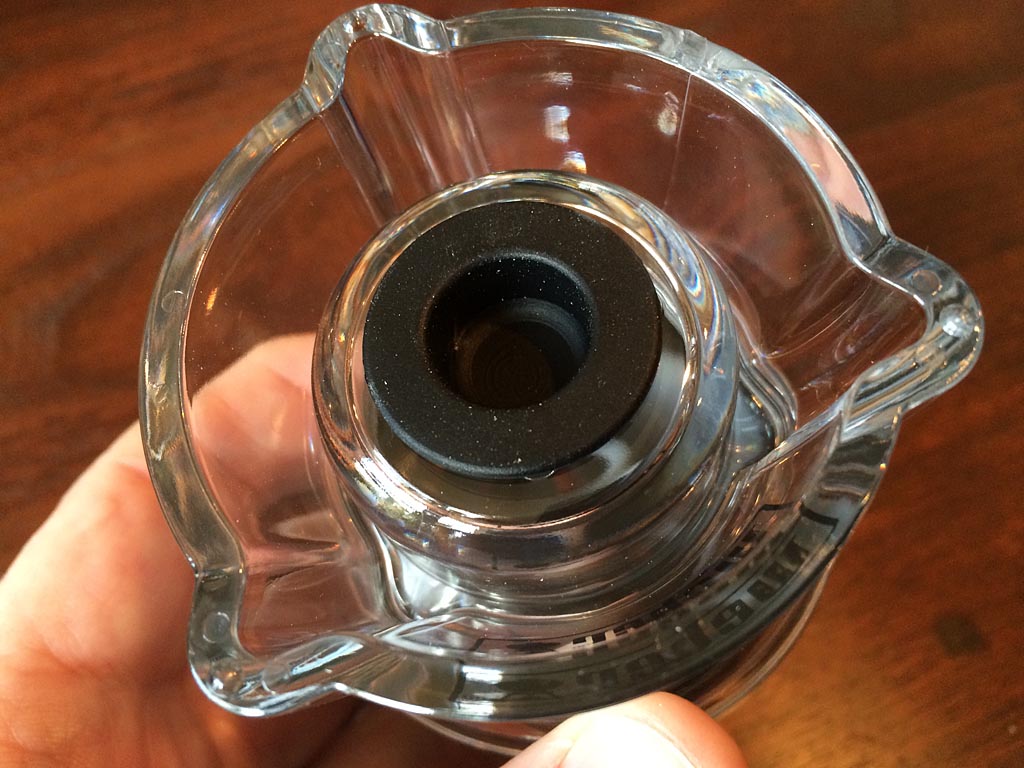
To fill, you turn the shaker upside down, remove the silicone stopper, and fill from the bottom. You must cover the holes with your hand or place the shaker upside down on a towel as your fill it. Not a huge deal, as just a few grains are lost during the process.

Using a funnel makes it easy to fill these guys neatly, and even if you overfill, the base catches the overflow so you can easily pour it back into the original container. I’m not sure if this is an intentional design feature, but it is helpful.

View of shaker holes

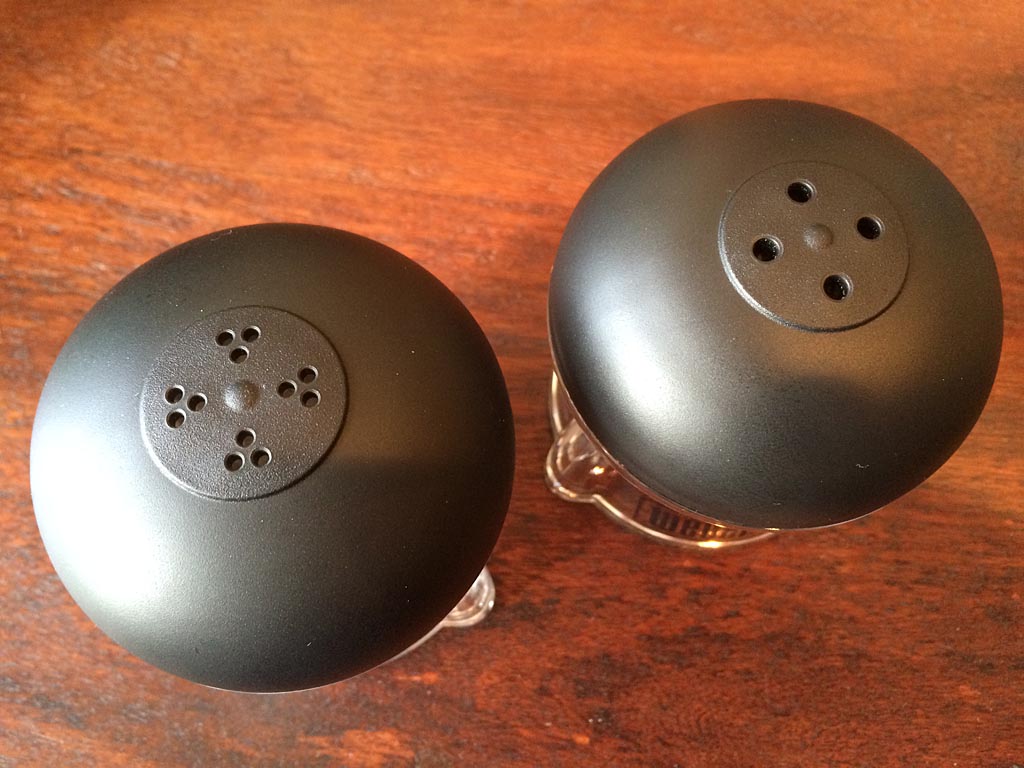
Table salt and regular ground black pepper work best in these shakers, but the holes are large enough for kosher salt and coarse-ground pepper. Both dispense a bit slowly but adequately.

If you intend to leave these shakers outside with your grill, you’ll want to prevent moisture or who-knows-what from getting inside. Unfortunately, they do not close, so you’ll have to put them in a Ziploc bag. Of course, if you’re using them inside the house, being able to close the shakers is not as much of an issue.

The Weber 6409 Salt & Pepper Shaker Set is available at Amazon.com.

Burn Off Grates Before Grilling, Not After

Skirt steak remnants on cooking grate

There are two, maybe three reasons why it’s best to burn-off the grates in your gas grill before grilling, not after:

1) You preheat the grill and burn-off the grates in a single step, saving time and fuel.

2) There’s zero chance of forgetfulness. If you burn-off after cooking, you go into the house and enjoy your meal, only to realize 30 minutes later that your grill is glowing cherry-red-hot out on the patio. In fact, on one occasion, I left the house to run errands with my Weber Summit 450 burning-off in the backyard. I’ll never make that mistake again.

3) Leaving carbonized debris on raw cast iron grates between uses may help prevent rusting.

Ripping-hot grill and a good grill brush
Grates ready for the next steak

Grilled Bell Peppers

Grilled bell peppers are easy to make and delicious by themselves or more often as an ingredient in a larger dish. But not everyone knows how to prep bell peppers for grilling, so we’ll cover both prep and grilling in this post.

Rinse and dry the bell peppers, and remove any stickers on the surface.

Cut off the top and bottom of the pepper.

Remove top and bottom of bell pepper

Remove the center of the bell pepper using a knife or your fingers.

Remove seed pod from pepper

Slice down one side of the pepper and open it up so it lays flat.

Opening up the pepper

Remove the internal ribs.

Remove internal ribs of the pepper

Cut into manageable pieces for grilling.

Trimmed bell pepper

Brush both sides with vegetable oil or olive oil.

Brush pepper with oil

Season both sides with salt and black pepper.

Season pepper with salt and black peppet

Preheat the grill on HIGH. Use a grill brush to remove any debris, then reduce heat to MEDIUM.

Start the peppers skin side down.

Starting peppers skin side down

Grill for 5-8 minutes until charred and blistered. Turn the peppers and grill another 3-5 minutes until the flesh is soft.

Charred bell peppers

Remove the peppers from the grill. They can be eaten as-is or cut into smaller pieces for use in other recipes.

img_3778-1024

I always leave the charred skin on because that’s where all the flavor is!

If you have a recipe that calls for the skins to be removed, place the grilled peppers in a bowl and cover with plastic wrap. Let the peppers steam for about 5 minutes.

Steaming peppers to remove skin

Pull off the skins using a paper towel or scrape them off using a knife.

Simple Sirloin Steaks

When I was a kid growing up in the 1970s, it was a big deal to go out for dinner at Saddle ‘N Sirloin in my hometown of Santa Rosa, California. In those days, going out for a steak dinner usually meant an affordable sirloin, and it was considered a special treat. Add some A-1 Steak Sauce (we didn’t know any better), a baked potato, and all-you-can-eat salad, ranch beans, and sourdough bread and you had a real meal!

Saddle 'N Sirloin matchbook

Today, I’m more likely to enjoy a ribeye steak or a filet mignon or a strip steak, but occasionally I get a hankering for a sirloin. What a sirloin steak lacks in tenderness and fat marbling, it makes up for in good flavor without breaking the bank.

So one day I’m shopping at Walmart and see these sirloin steaks on sale. I don’t typically buy meat at Wally World, but they looked pretty good and the price was right, so I picked up two.

Sirloin steak on sale

A sprinkle of garlic salt and black pepper was all that was needed before throwing these steaks onto the grill. You can make your own garlic salt by mixing 3 parts table salt with 1 part granulated garlic powder.

Steaks seasoned with garlic salt and black pepper

Preheat the grill on HIGH for 10 minutes, then use a grill brush to remove any debris. Reduce the temp to MEDIUM and grill over DIRECT heat.

Grilling sirloin steaks over medium heat

For a 3/4″ thick steak cooked to medium doneness (160*F), grill for 4-5 minutes per side; for a 1″ thick steak, 5-6 minutes per side. Increase or decrease the cooking time to achieve your preferred doneness.

Resting sirloin steaks after grilling

In the few minutes it takes to get the steaks off the grill and onto your dinner plate, and for you to find a steak knife, these guys will have rested enough for the juices to redistribute throughout the meat.

Close-up of grilled sirloin steak

These sirloin steaks are ready to enjoy!

As for steak sauce…I don’t do A-1 anymore. But in homage to the 1970s, I tried some Heinz 57 Sauce which was top-rated in a taste test by Cook’s Country magazine. They said that Heinz “provided a nice counterpart that let the meat shine through without overwhelming.” It’s “tomatoey, spicy, and earthy,” with a “sweetness [that] is rich and fruity,” and it has a “peppery tang.”

I’m not a big fan of steak sauce in general, but I thought Heinz 57 was pretty good as steak sauces go. More importantly, it served its purpose of taking me back to a simpler time when a sirloin steak and a bottle of steak sauce were not just a weeknight meal, but a special occasion.

P.S. Less-tender steaks like sirloin might benefit from the salting process described in this post: Salted Ribeye Steaks.

Should Burgers Be Salted Before Or After Grilling?

Grilling sliders on the Weber Summit

When grilling a burger, should you salt it before or after grilling?

The good folks at Cook’s Illustrated magazine say you should sprinkle burgers with salt at the last minute, just before grilling.

Why? Because mixing salt into the meat before shaping the patties results in a firm texture similar to sausage, and salting on the outside 30 minutes before grilling results in burgers that are tender on the inside but dry on the outside.

Burgers that are salted on the outside at the last minute before grilling have the best texture inside and out. So dust your burgers with salt (and pepper) and toss them on the grill immediately for best results!

Protecting Your Grill From Theft

Bob Correll on The Virtual Weber Bulletin Board has an idea for protecting your high-priced Weber gas grill from theft that involves deception.

31tTltEH3kL

But seriously, grill theft does happen and there are steps you can take to protect your investment in Weber quality.

I once lived in an apartment complex where my Weber Genesis 2 was situated on a patio in front of my unit, behind an unlocked gate just a few steps from a common walkway. I could just imagine someone rolling off with my grill while I was away at work.

As a deterrent, I drilled a hole in the concrete patio and installed a lag shield anchor and large eye bolt. I secured the grill frame to the eye bolt using a beefy bicycle cable and padlock.

My grill was never stolen. I know my solution wasn’t perfect, that locks and cables can be cut, but it did make theft more difficult and it felt better than doing nothing at all. And when I moved out of that apartment, it was easy to remove the eye bolt and anchor and no one noticed the hole in the concrete patio. If I’d been thinking, I would have filled the hole with concrete caulk and made it disappear completely.

So give some thought to your grill security situation and come up with a solution that’s right for you. It may involve simply moving your grill to a more secure location on your property. It may involve a cable and lock like I used. Or maybe you’ll come up with your own innovative solution. If so, I hope you’ll share it here and on The Virtual Weber Bulletin Board so we can all learn how to keep our grills safe and secure.

Butternut Squash

My good friends John & Amy live in the Santa Cruz Mountains above Silicon Valley. They have a beautiful garden in which they grow all sorts of veggies, including this butternut squash.

It turns out butternut squash is quick and easy to grill. The hardest part is cutting it up!

Peel the squash, cut into thick planks, and remove the seeds. Brush both sides with a mixture of 4 tablespoons olive oil, 2-3 cloves of garlic run through a garlic press, and salt & pepper to taste.

squash1-1024

Preheat the grill on MEDIUM, making sure the grates are clean.

squash2-1024

squash3-1024

Grill for 6 minutes on the first side, then flip, tent with aluminum foil and grill for another 6 minutes. You may need to turn down the heat a bit to prevent burning if your grill runs hot.

squash4-1024

The squash is done when you’ve got good grill marks and the flesh is soft when poked with a fork.

squash5-1024

squash6-1024

To serve, drizzle with a little EVOO. Taste for salt and sprinkle with more kosher salt, if needed. Enjoy!

Hamburger Sliders

Hamburger sliders are so fun and so easy to make…once you have the right buns!

First stop is the bread aisle at the supermarket. If you can find slider buns like Sara Lee Mini Buns, that’s perfect. If not, King’s Hawaiian or a similar small, soft dinner roll is a good alternative.

Once you’ve got the buns, it’s time for the beef! Buy a good quality ground beef, but not too lean so you get a nice, juicy slider. 80/20 or 85/15 lean to fat ratio is a good choice. I used Prather Ranch ground beef, something a friend turned me onto at the local Farmer’s Market. Too expensive for regular use, but a nice occasional treat and very good quality meat!

Divide one pound of ground beef into 6 portions. If you have a kitchen scale (and you should) that’s about 2.75 ounces per slider. Form into patties of even thickness and season with kosher salt.

IMG_2756-1024

For me, melty, gooey American cheese is a guilty pleasure on burgers. Use whatever cheese you like best, but since a slider is smaller than a regular burger, you’ll want to scale down the cheese portion, also. I tore American cheese slices into quarters and used three pieces per slider. Even that was a bit much, you can probably get away with just half a slice of cheese per slider.

IMG_2755-1024

Preheat your Weber gas grill on HIGH, making sure the grates are clean. Once preheated, turn the burners down to MEDIUM and arrange the sliders on the grill. They cook quickly due to their small size, so watch them carefully.

img_2783-1024

img_2777-1024

When the first side is done, flip and cook for just a minute or so before adding the cheese. Quickly toast the buns and you’re ready for some slider deliciousness!

img_2787-1024

img_2789-1024

Your best source for Weber gas grill information and discussion on the Web